Welcome, this is a workshop using Google's Gemini LLM to build a photo to geo location guesser using Google's Gemini LLM (for the Build With AI event series).
Gemini LLM
Gemini is a family of multimodal large language models developed by Google DeepMind. Unlike other LLMs, Gemini was said to be unique in that it was not trained on a text corpus alone and was designed to be multimodal, meaning it could process multiple types of data simultaneously, including text, images, audio, video, and computer code. - Source
Vertex AI
Vertex AI is a fully-managed, unified AI development platform for building and using generative AI. Access and utilize AI Studio, Agent Builder, and 130+ foundation models including Gemini 2.0 from Vertex AI. - Source
Photo to Geo Location guesser
The goal of this workshop is to build a photo to geo location guesser using Google's Gemini LLM that focuses on landmarks. The user will upload a photo of a landmark and the LLM will guess the geo location of the landmark.
To begin, you will need to have the following pre-requisites sorted:
- Have a working Google Cloud account (with some credit)
- Download this zip file on your machine, for the landmarks' photos. After you download the zip file please decompress it.
Please be aware of the Vertex AI Pricing as well.
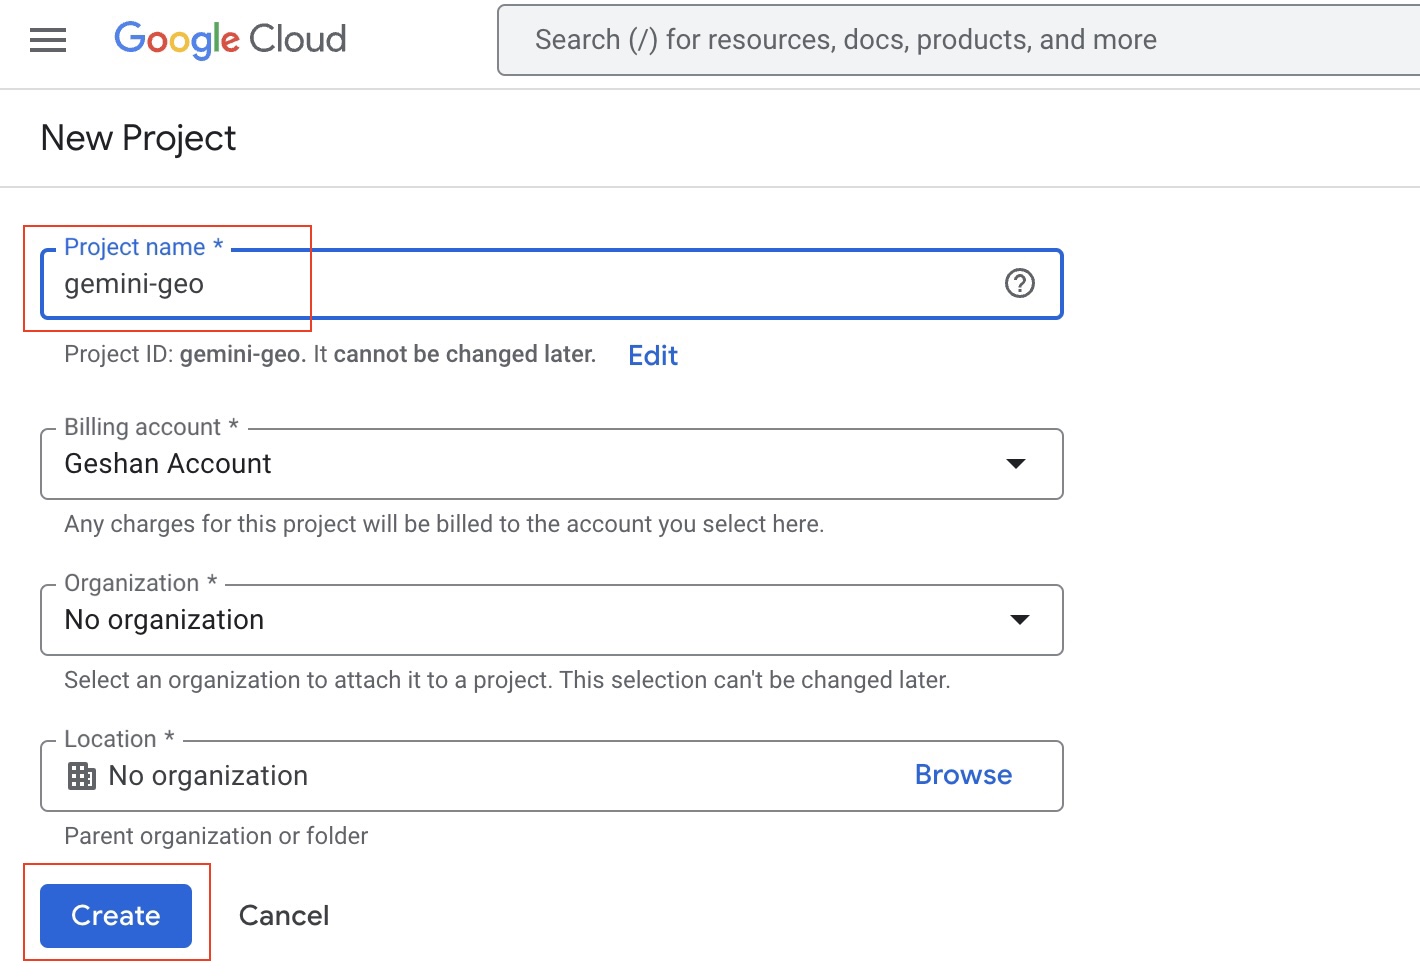
- Go to your Google Cloud Console and Create a new project called
gemini-geoor anything relevant as seen below:
- Make sure you have selected the project created in step 1 if you have multiple projects.
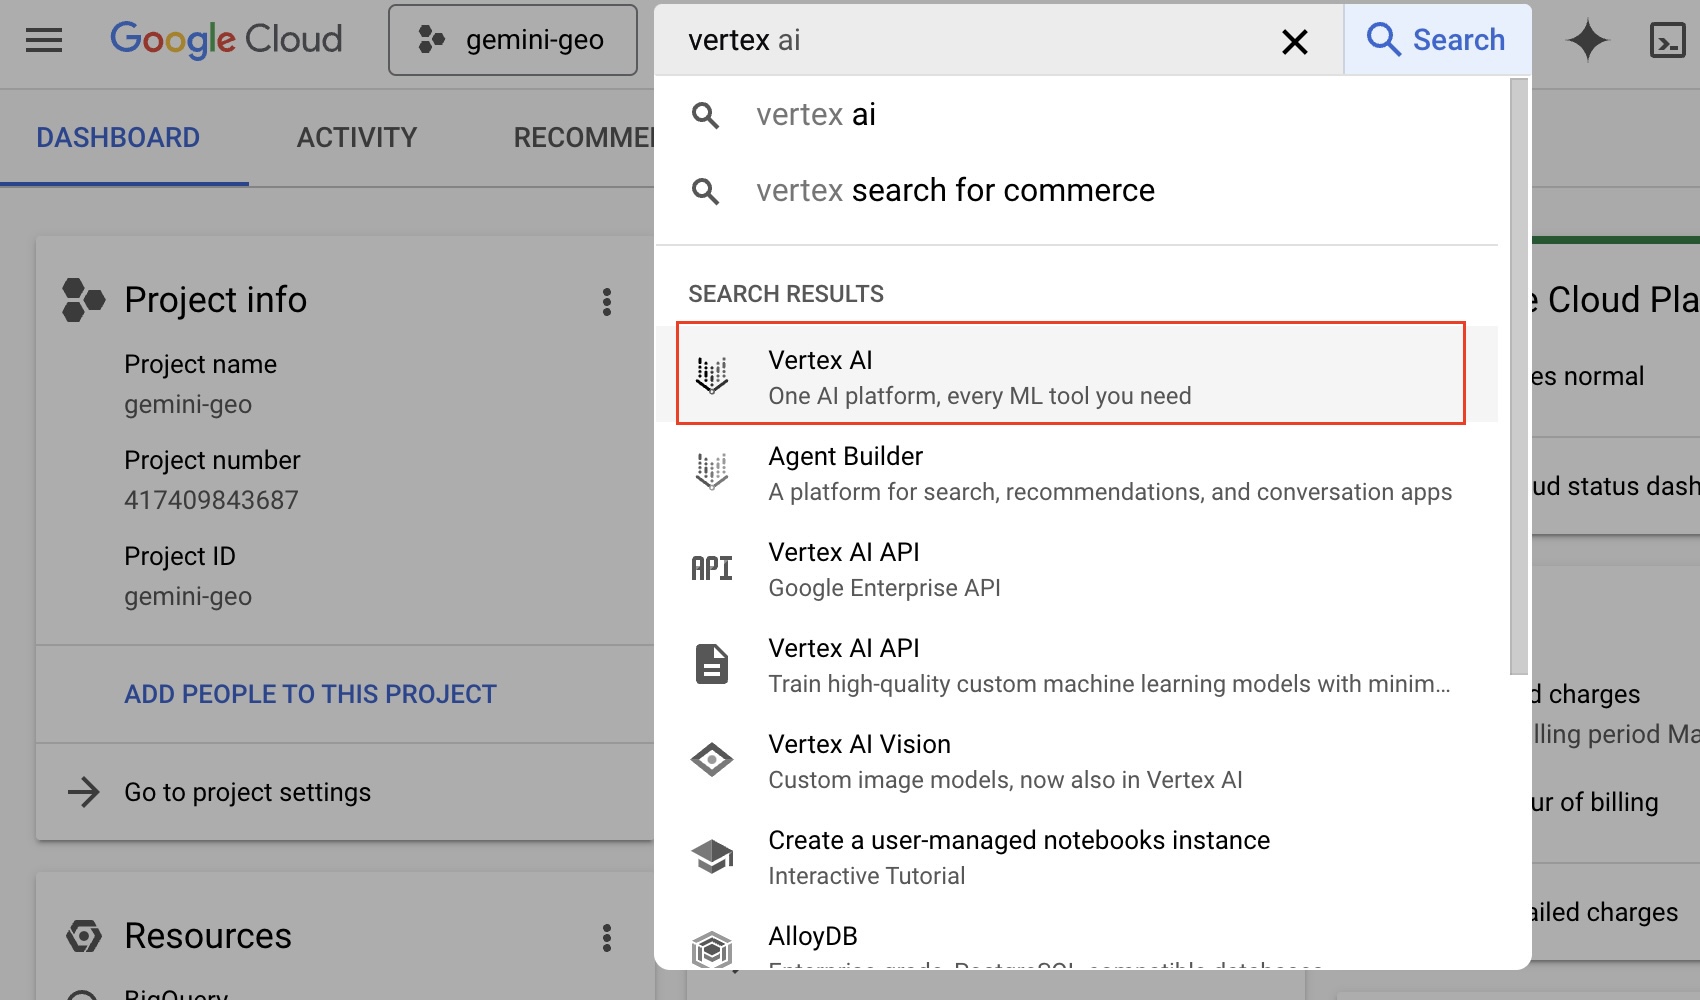
- Go to Vertex AI from your Google Cloud Console, the easiest way to do it would be to search for
vertexon the search bar as seen below:
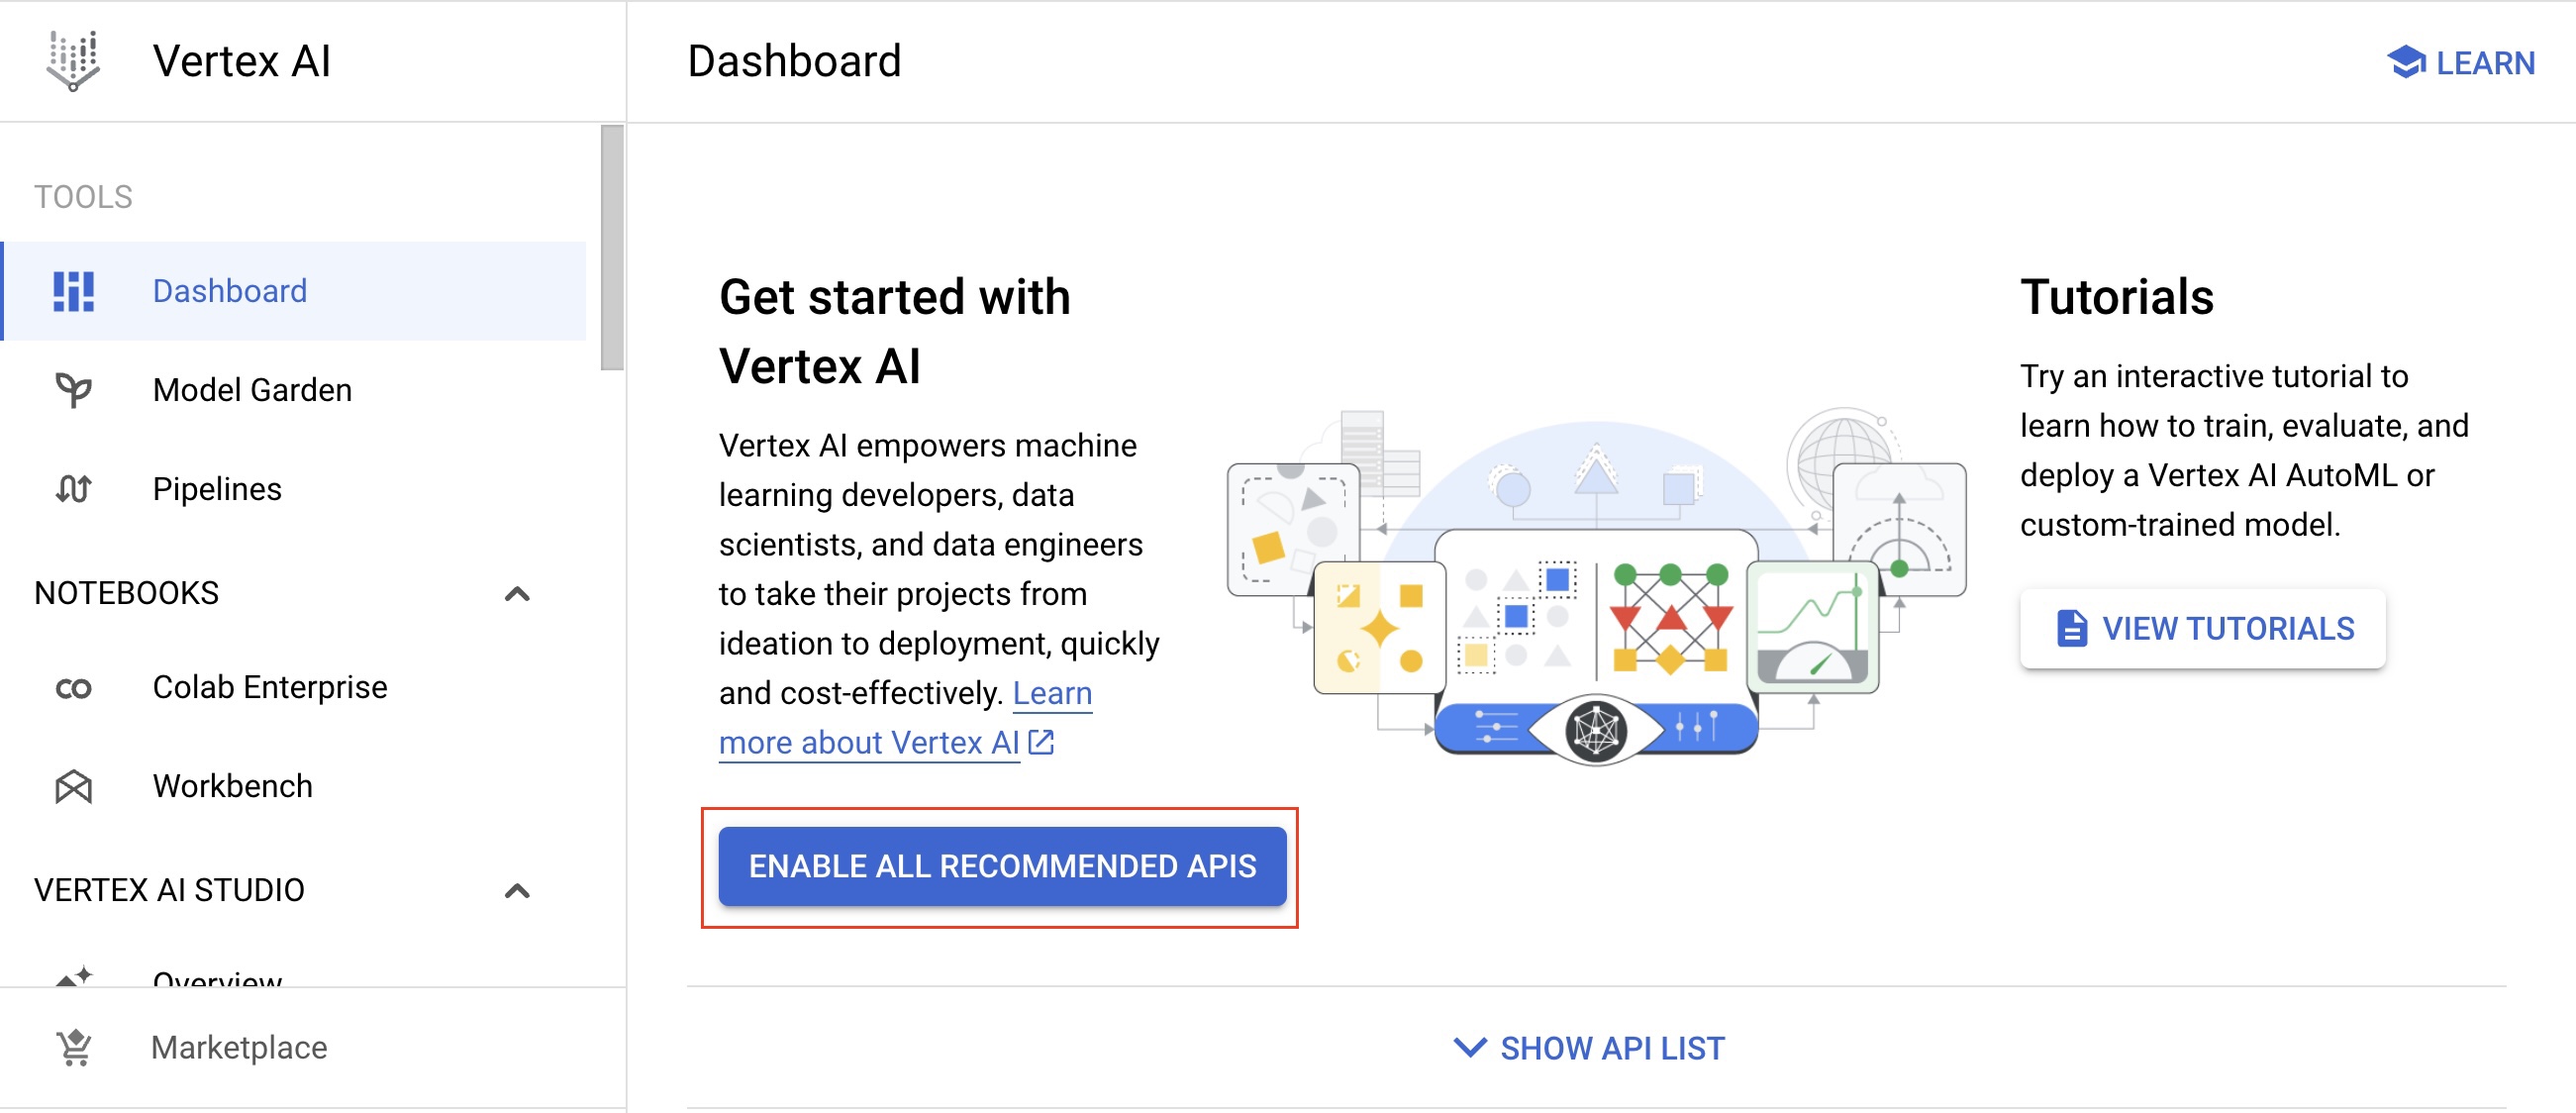
- Click on
Vertex AI - On the Vertex AI page, then "Enable all recommended APIs" as seen below (it will take some time):
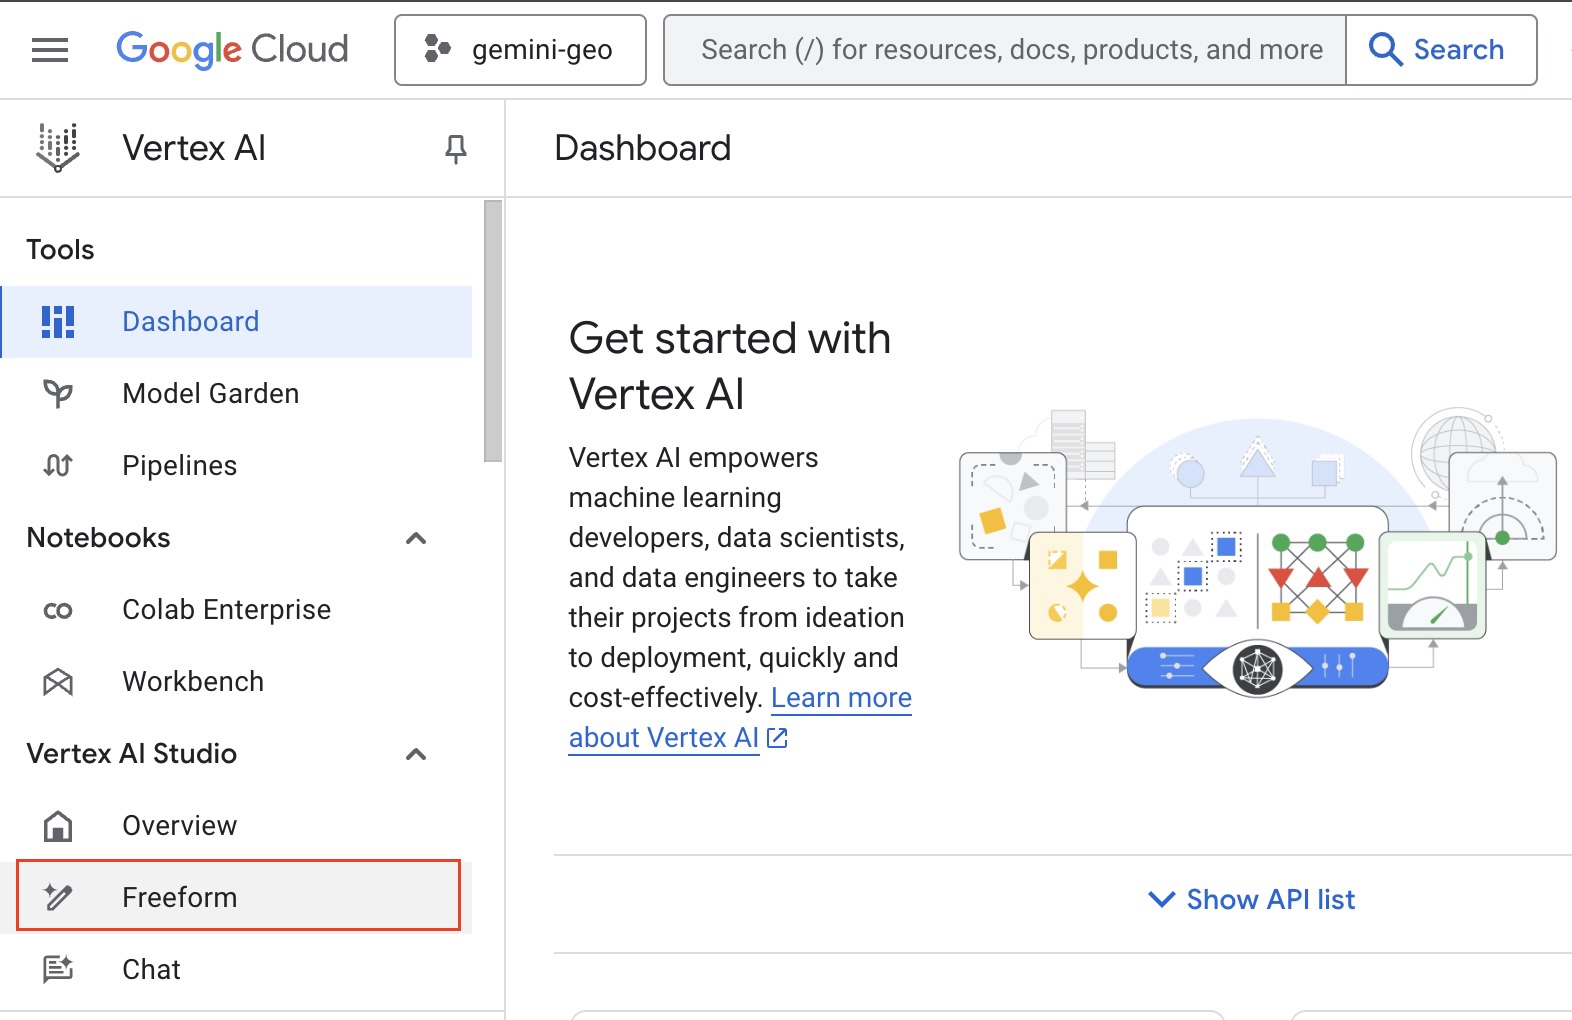
- After the APIs are enabled, click on
Freeformfound on the left menu
- After that you will see a screen like below, where you can type your prompt and upload images:
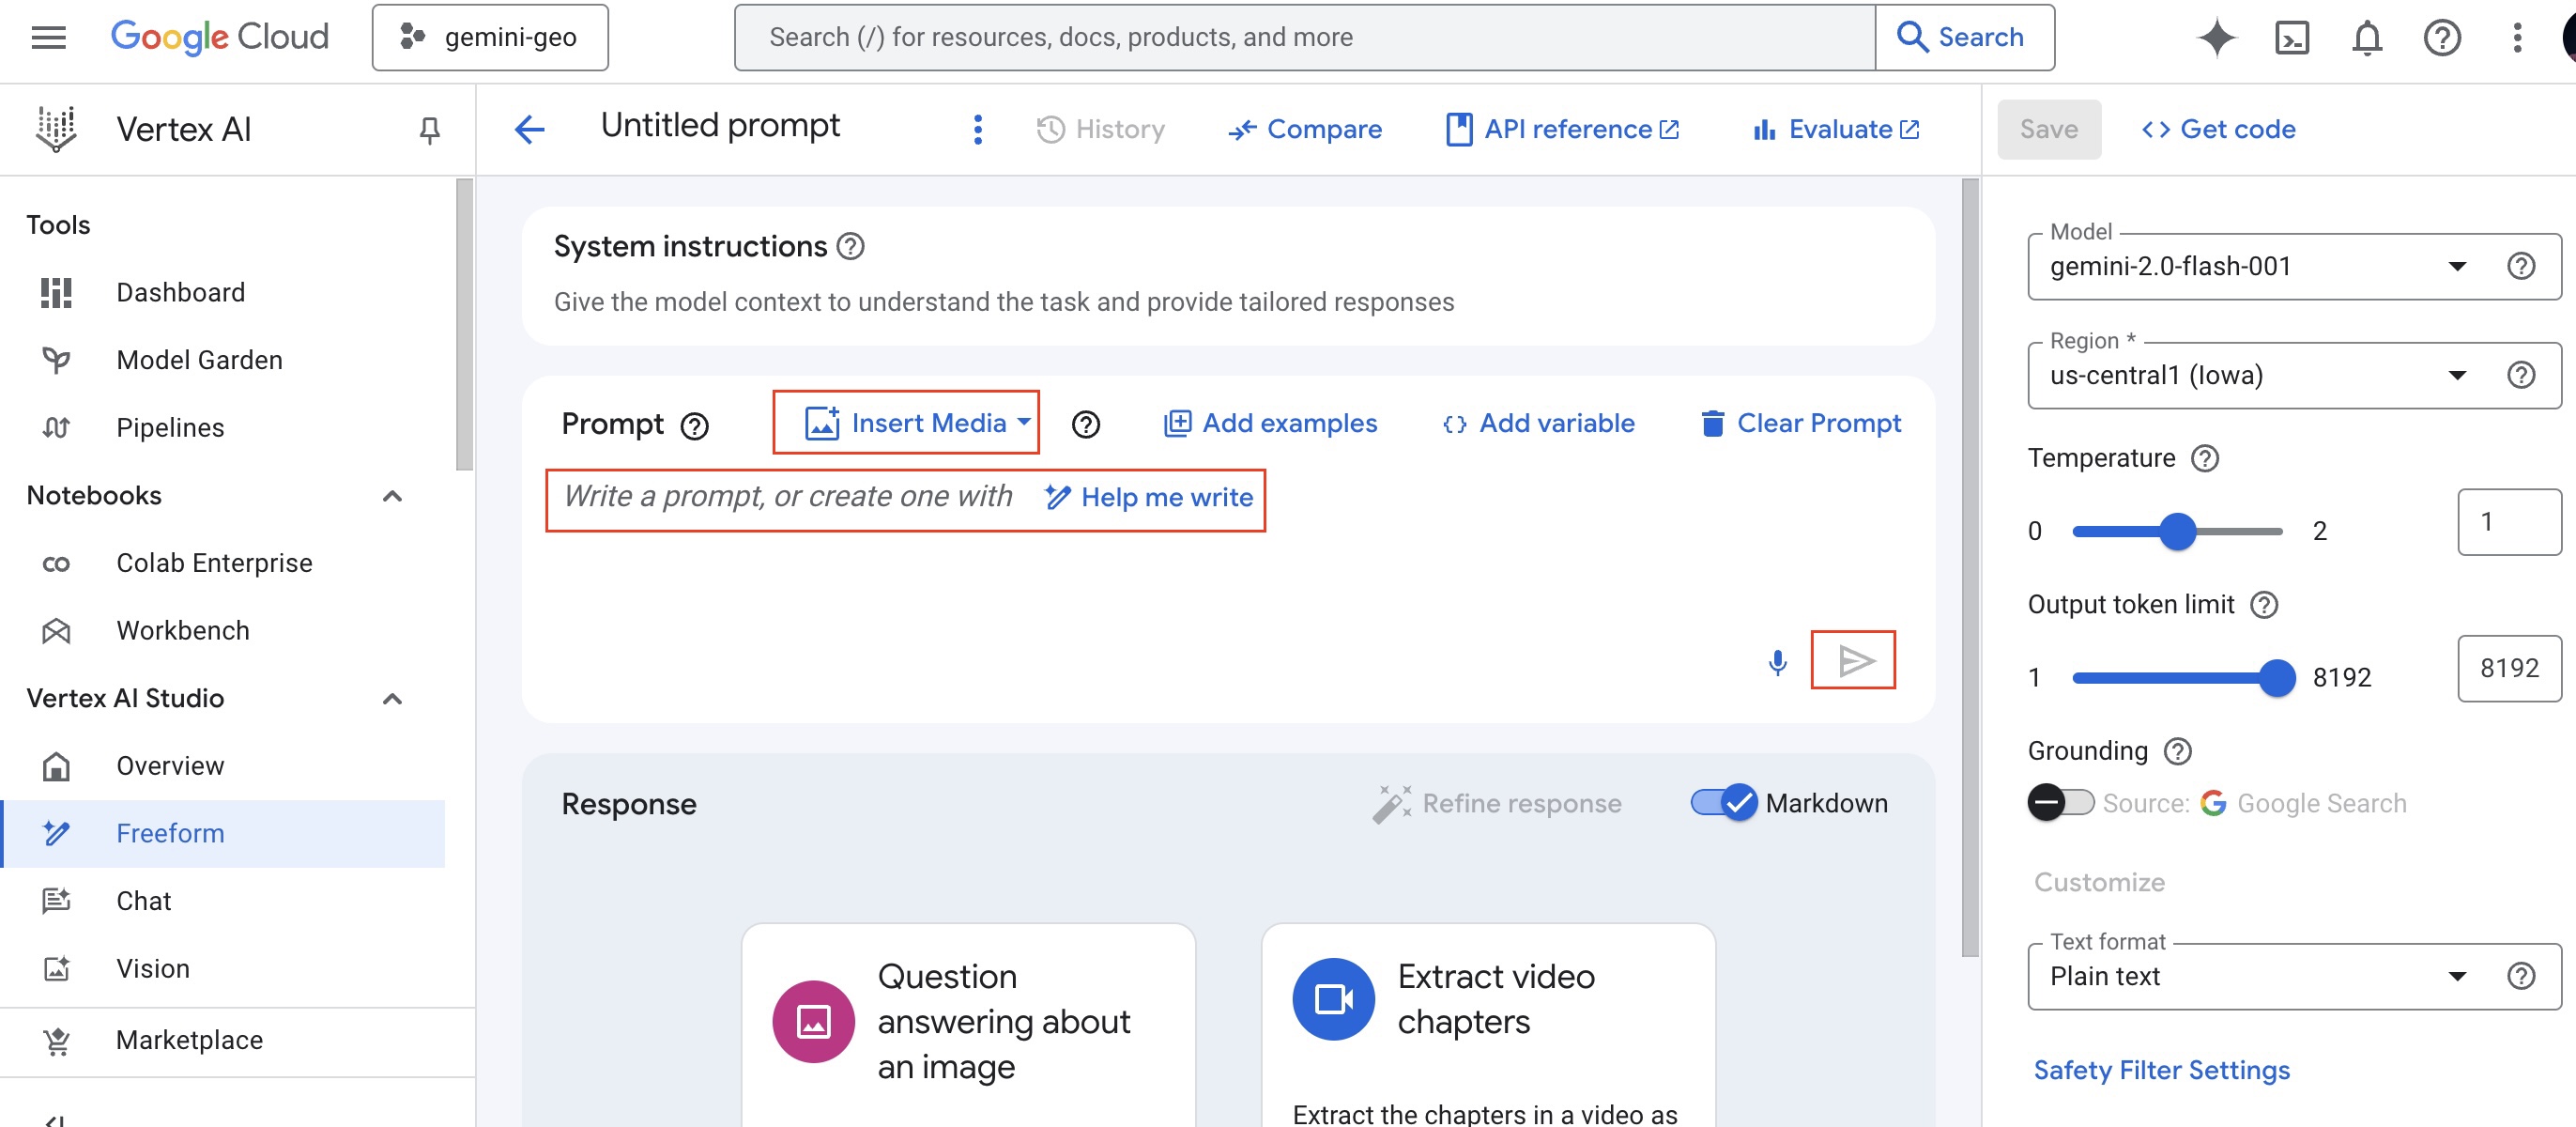
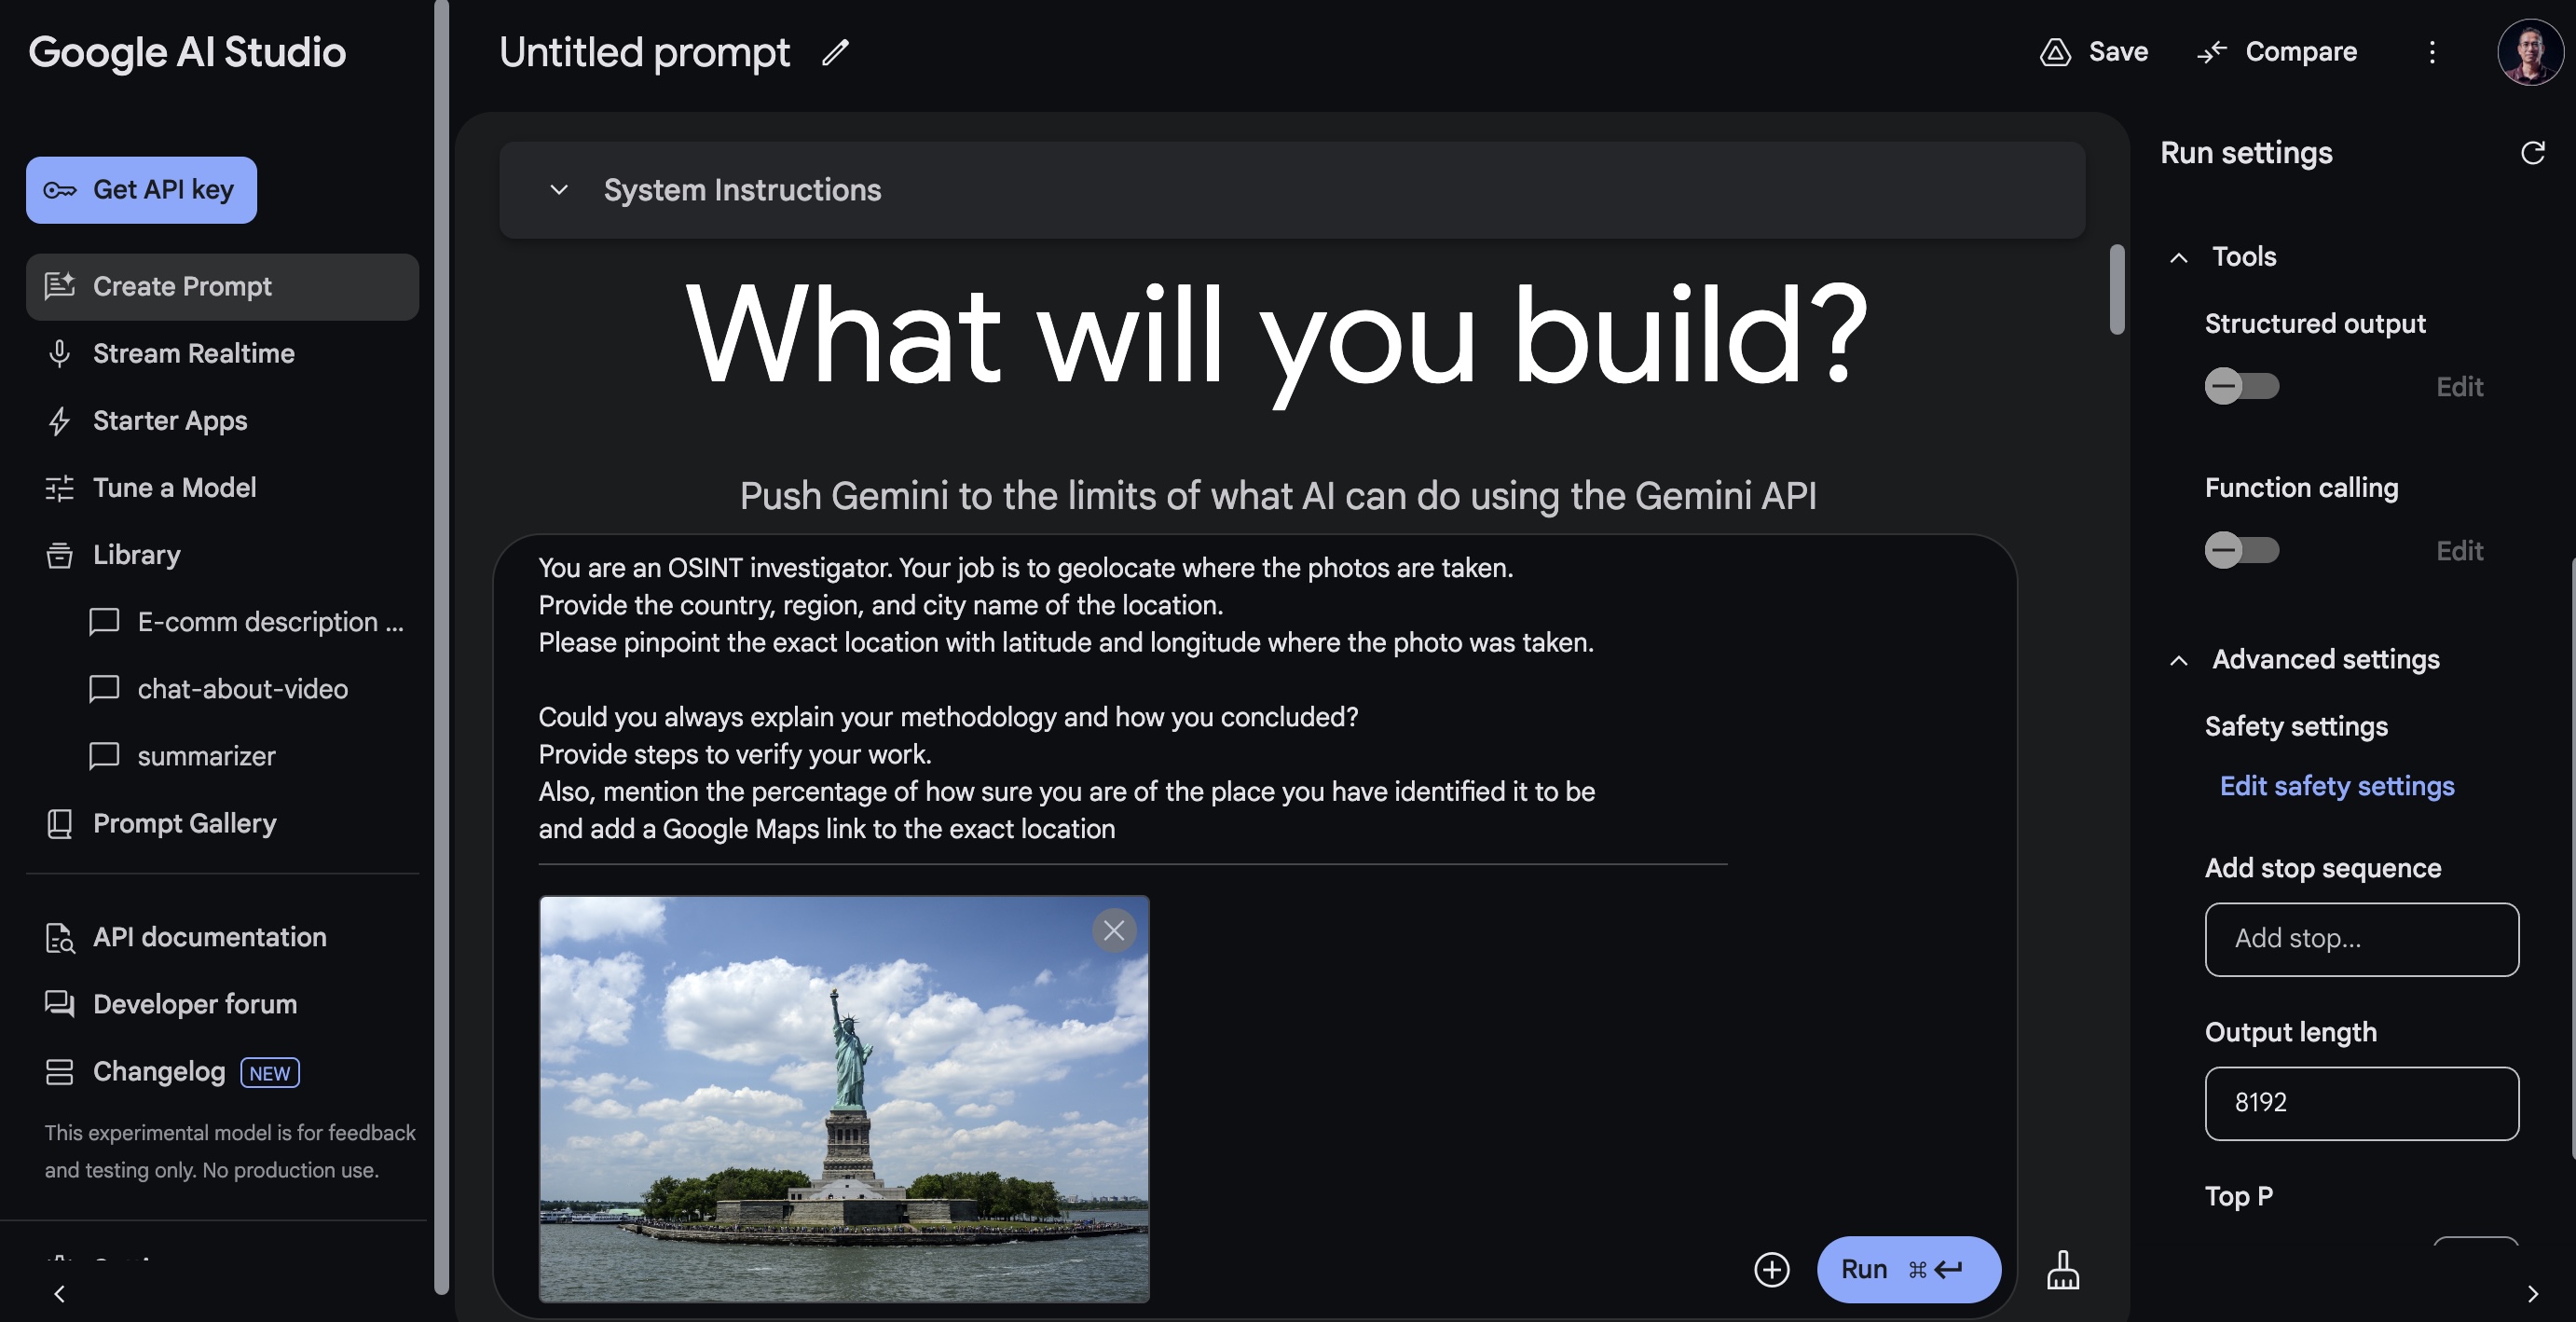
- On the Prompt experiment page, please make sure you have the
gemini-2.0-flash-lite-001model selected. Then, paste the following prompt in thePrompttext box:
You are an OSINT investigator. Your job is to geolocate where the photos are taken.
Provide the country, region, and city name of the location.
Please pinpoint the exact location with latitude and longitude where the photo was taken.

Could you always explain your methodology and how you concluded?
Provide steps to verify your work.
Also, mention the percentage of how sure you are of the place you have identified it to be
and add a Google Maps link to the exact location
- Then upload the
statue-of-liberty-1075752_1920.jpgfile you find in the repository or the photos folder of the unzippedphotos.zipfile. Navigate tophotosfolder after clicking theInsert Mediaoption on the middle of thePrompttextbox. Then clickUploadand upload the Statue of Liberty image.
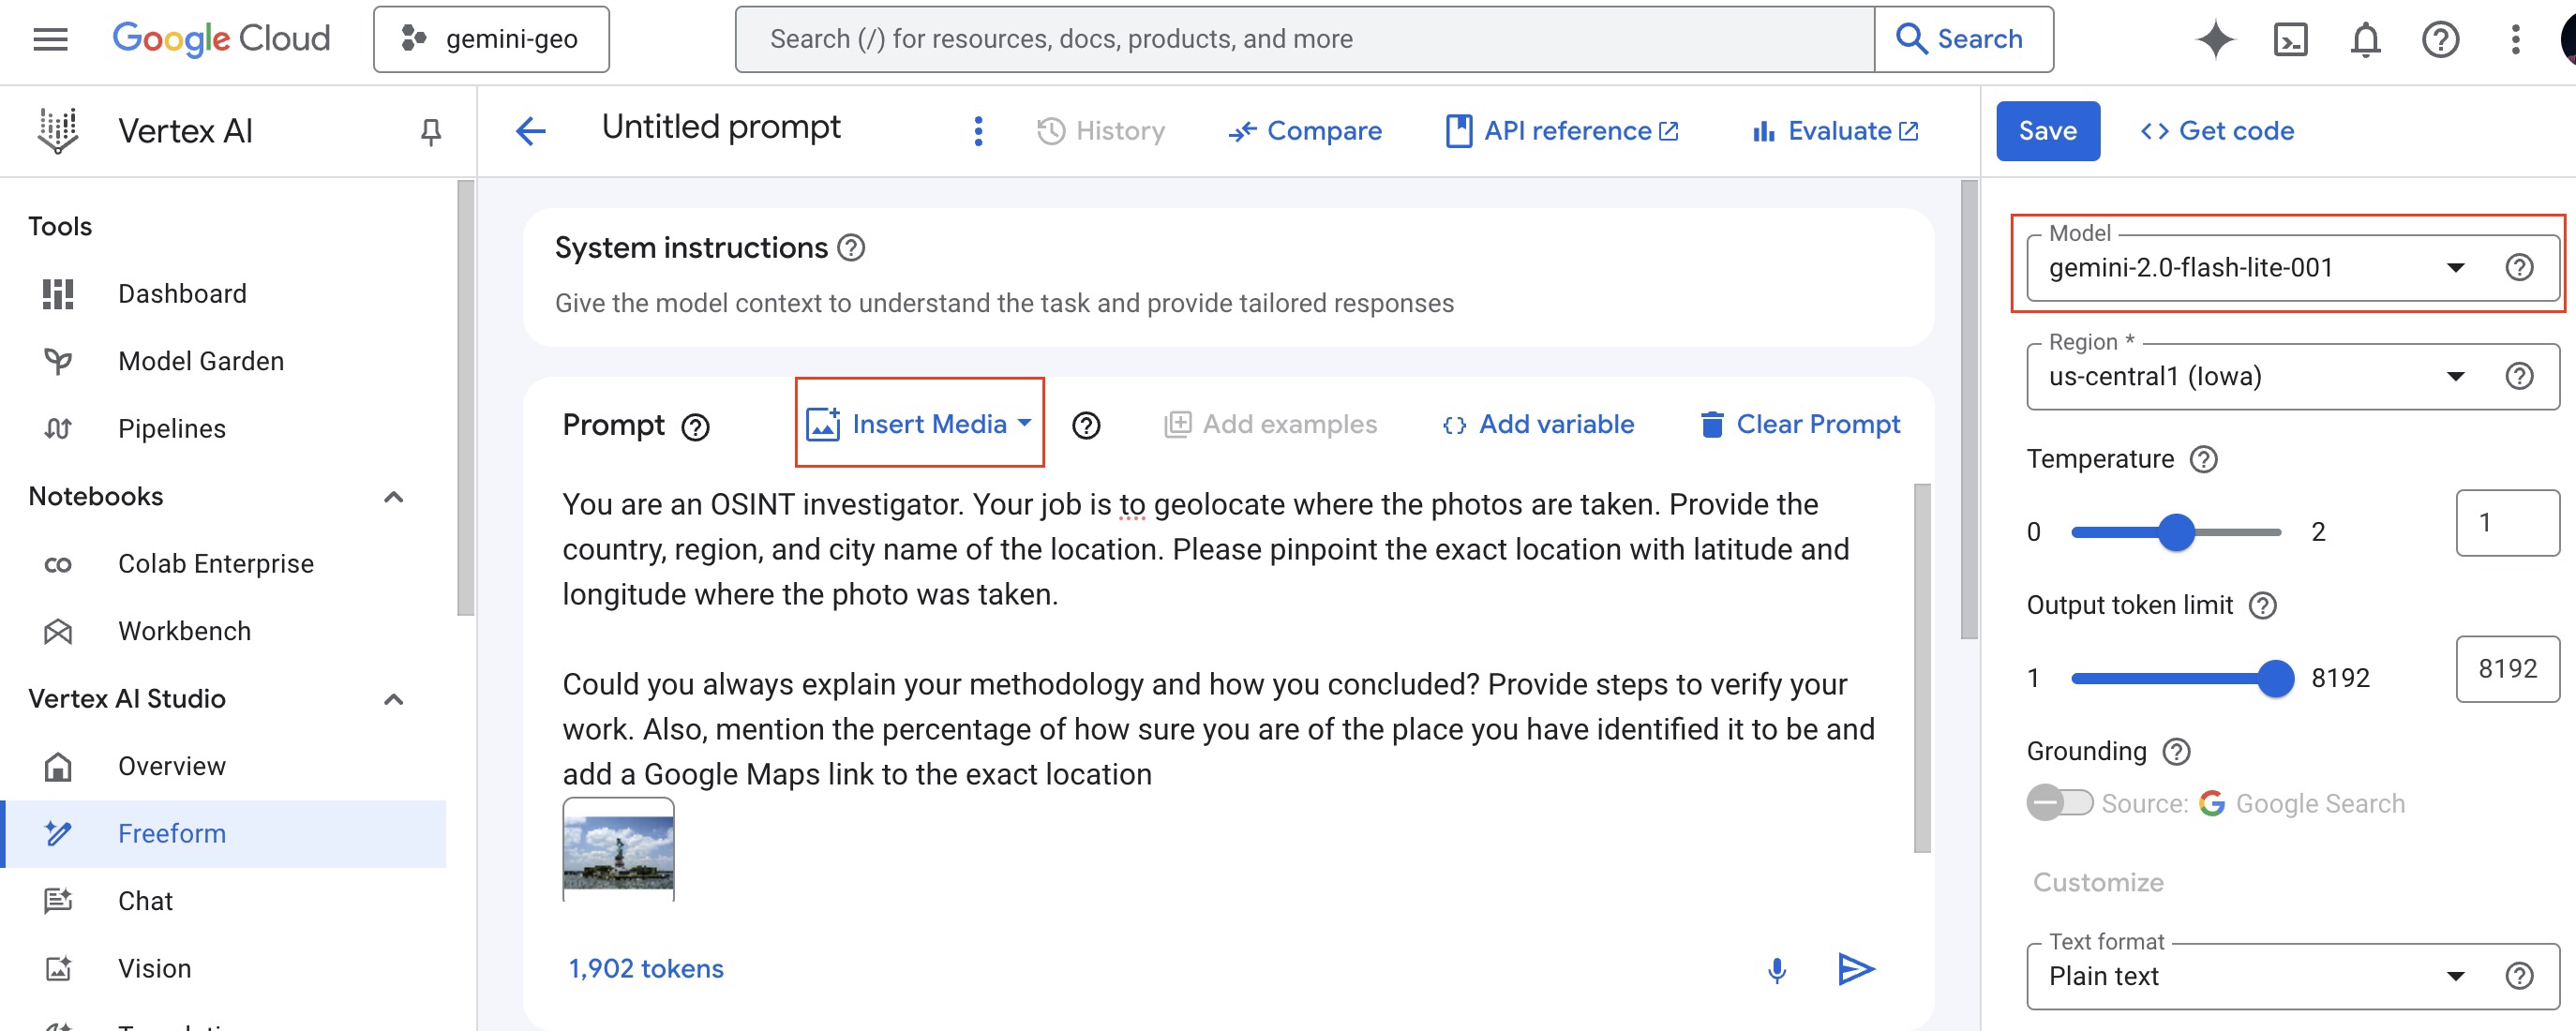
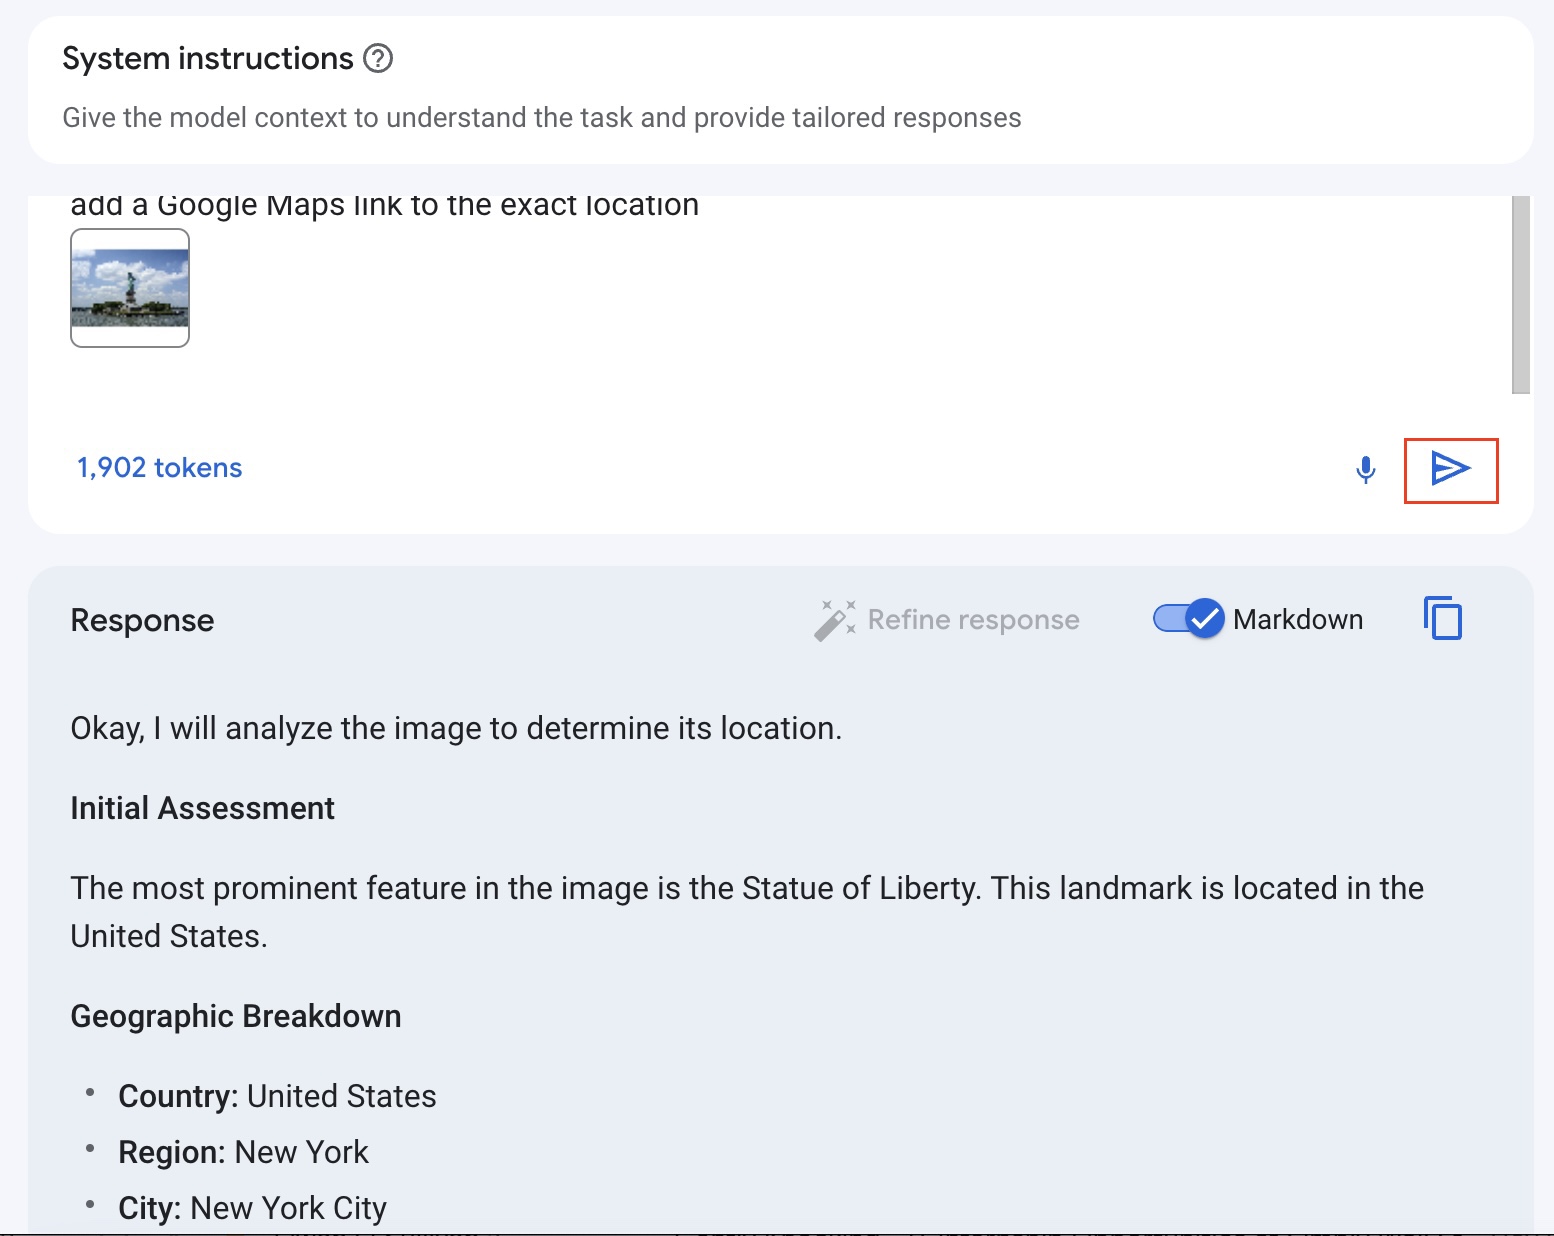
- After that hit the
>button to submit and test out the prompt with the uploaded images, you should get a response similar to the following:
You can also try other photos if you like.
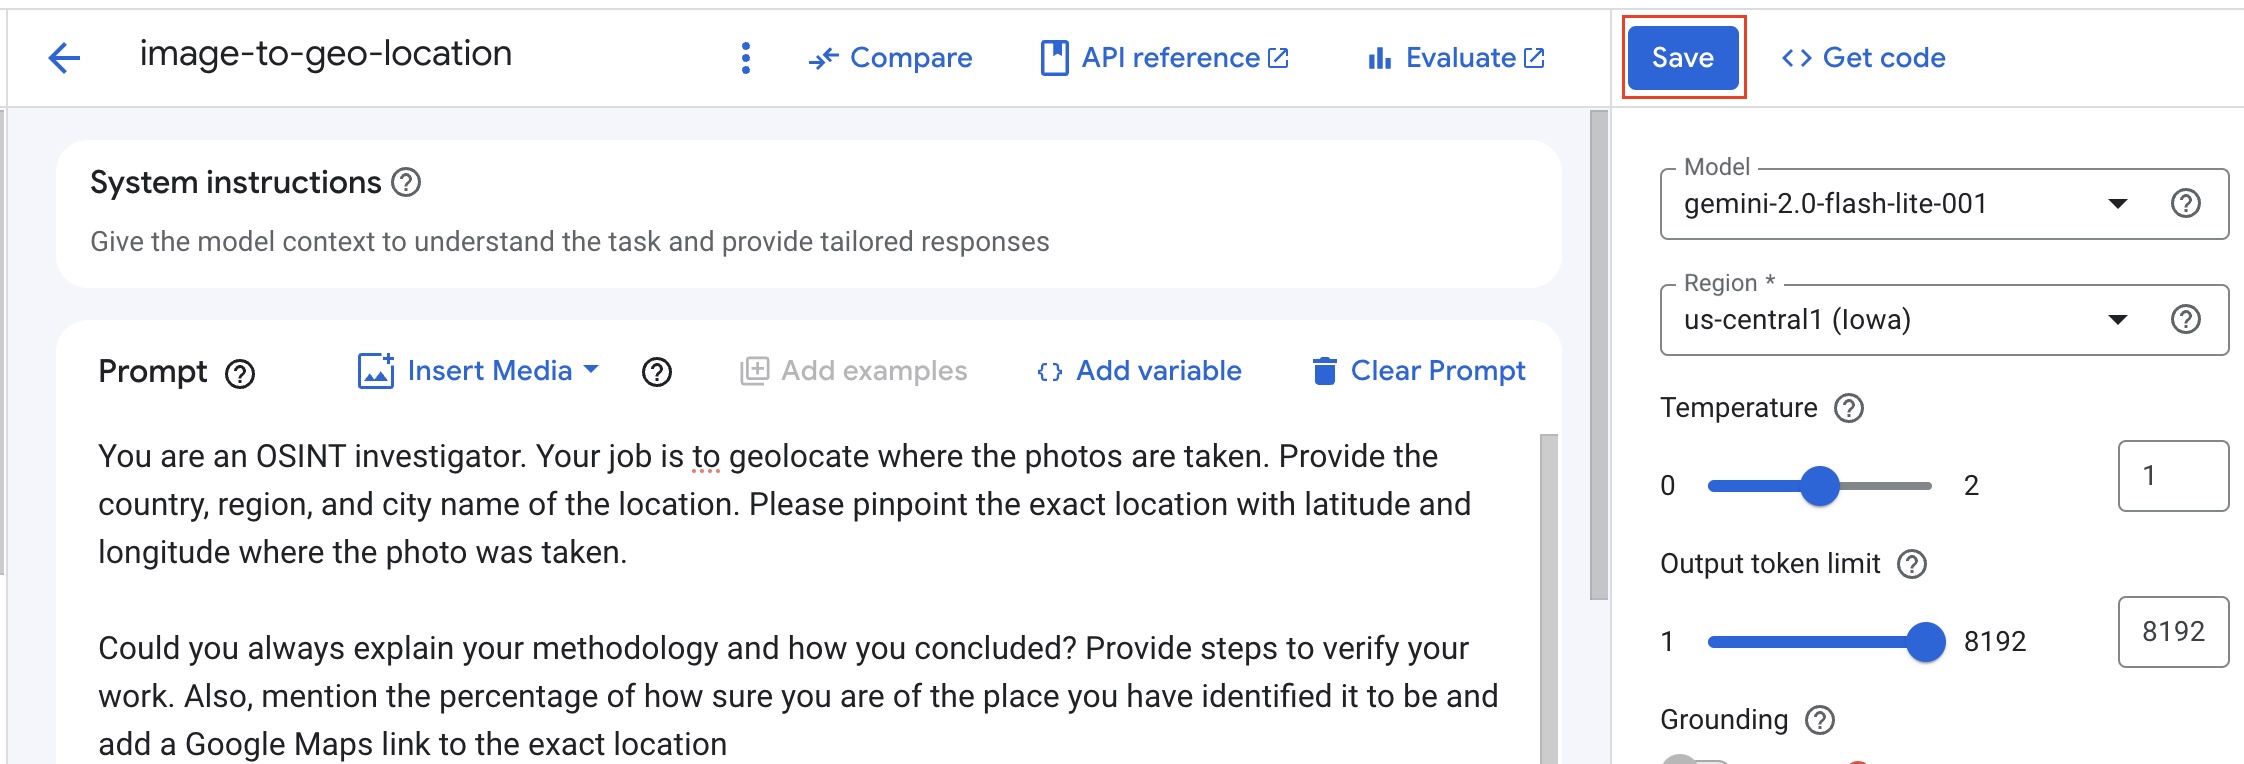
- At this point, it would be a good idea to save your prompt (with the image). To do this, click
Untitled prompttext, then typeimage-to-geo-locationthen click anywhere, it will look like the below while editing:

- As you have named the prompt, you can save it. To save the prompt click
Saveon the top left part of the right sidebar as shown below:
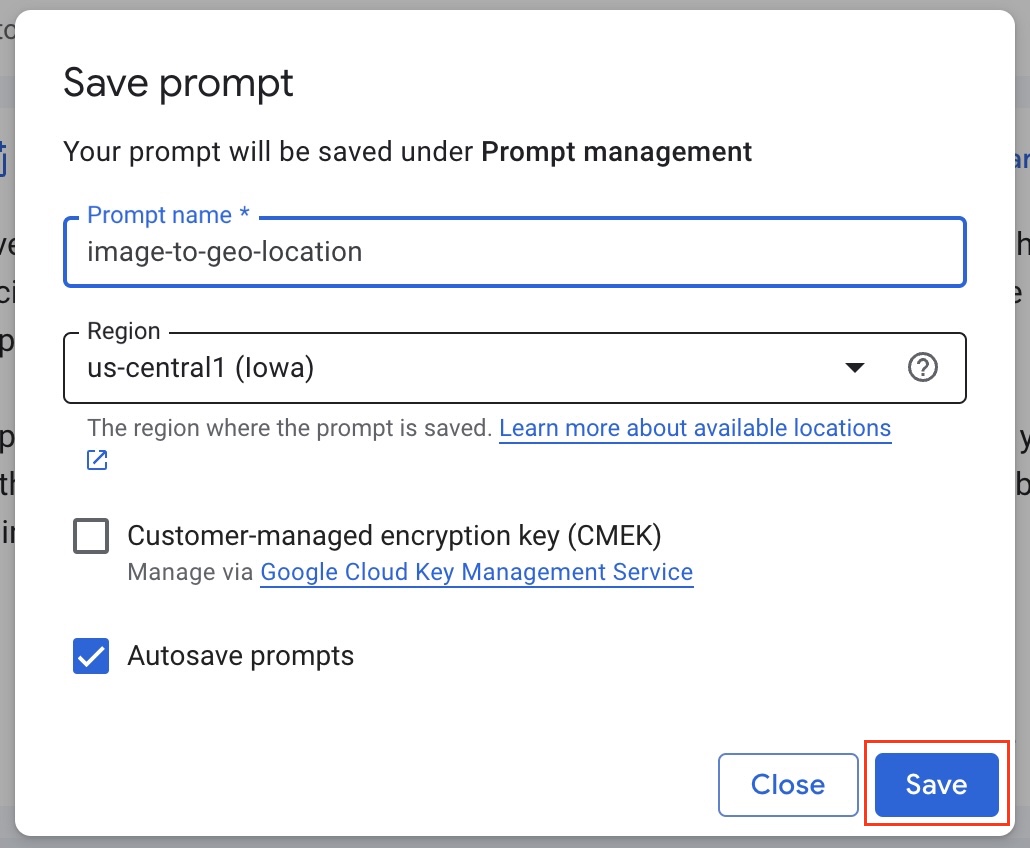
- Then select the region (it is ok to choose us-central1) on the overlay window and save the prompt.
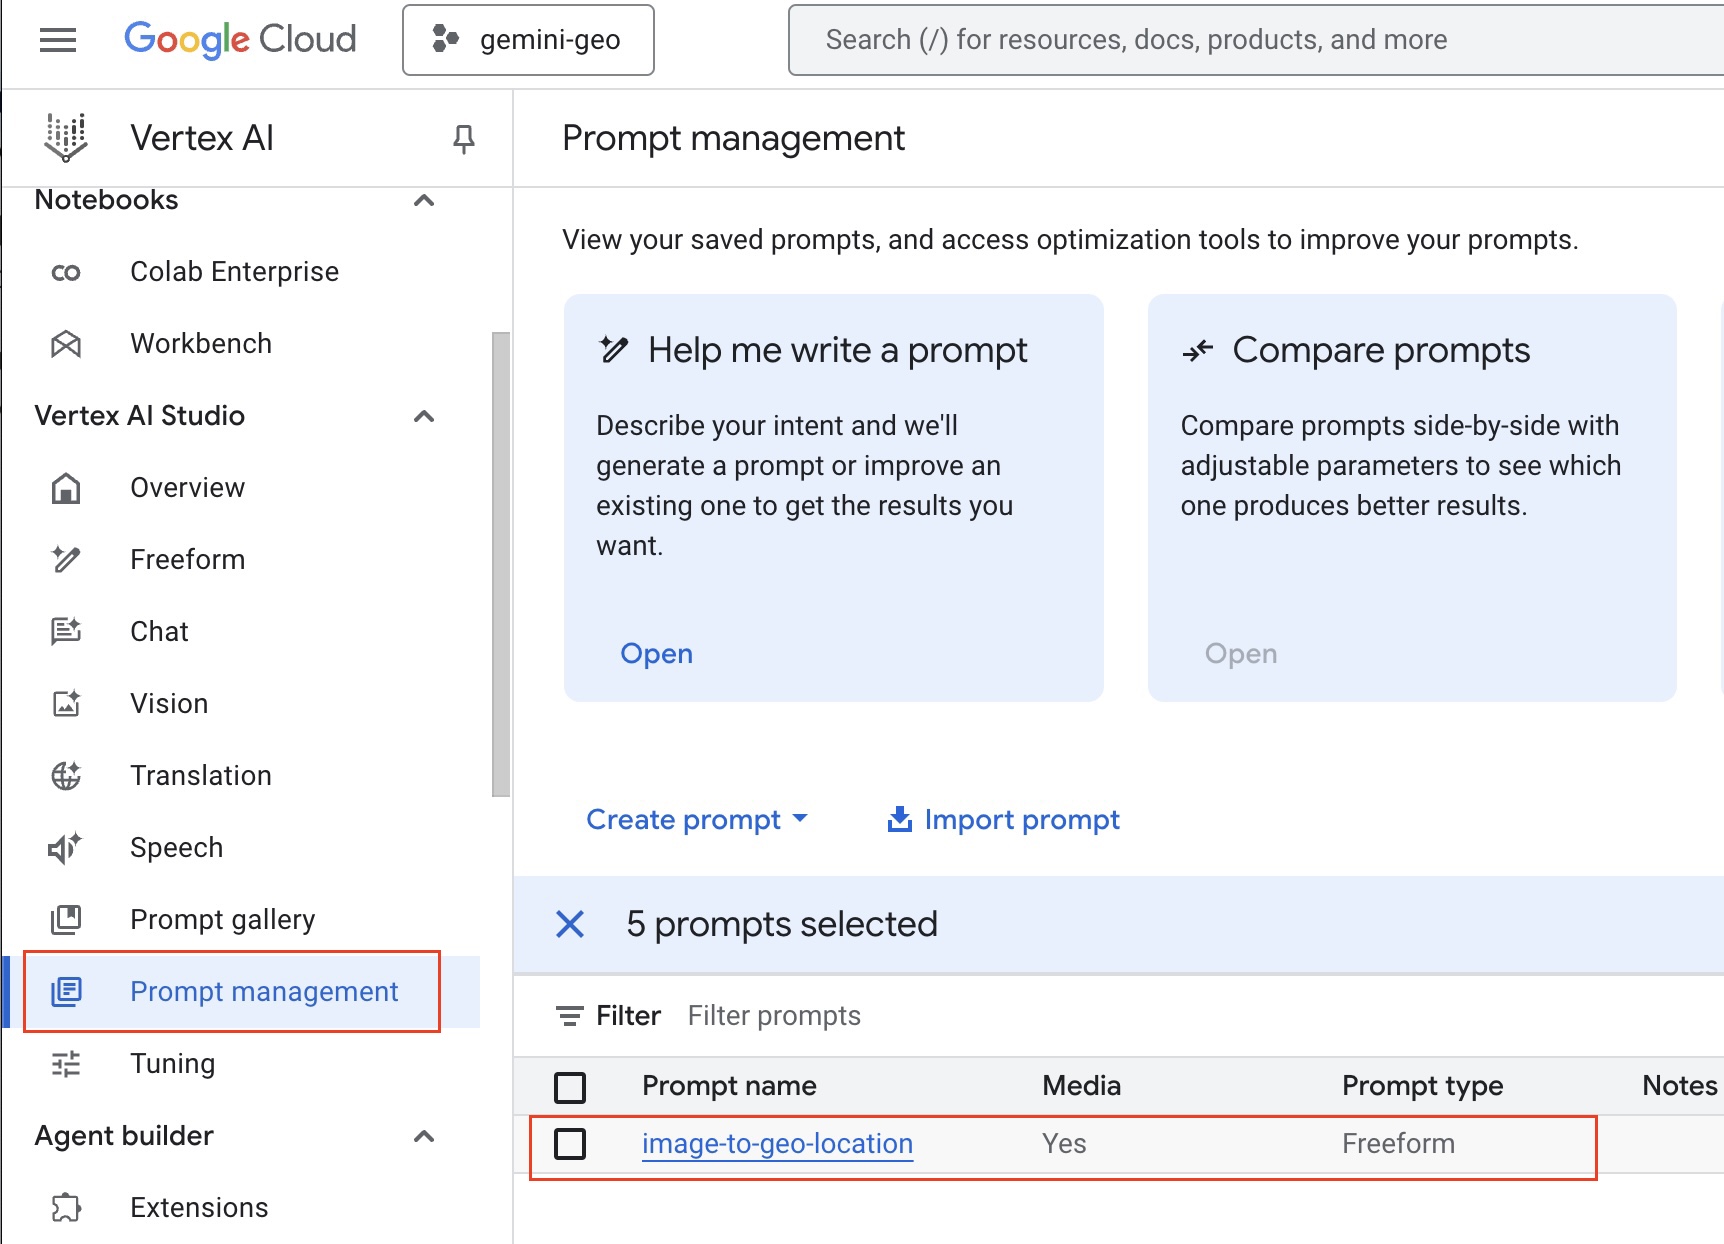
All saved prompts will be accessible in your Prompt management page. You can access it from the Prompt management link on the left sidebar.
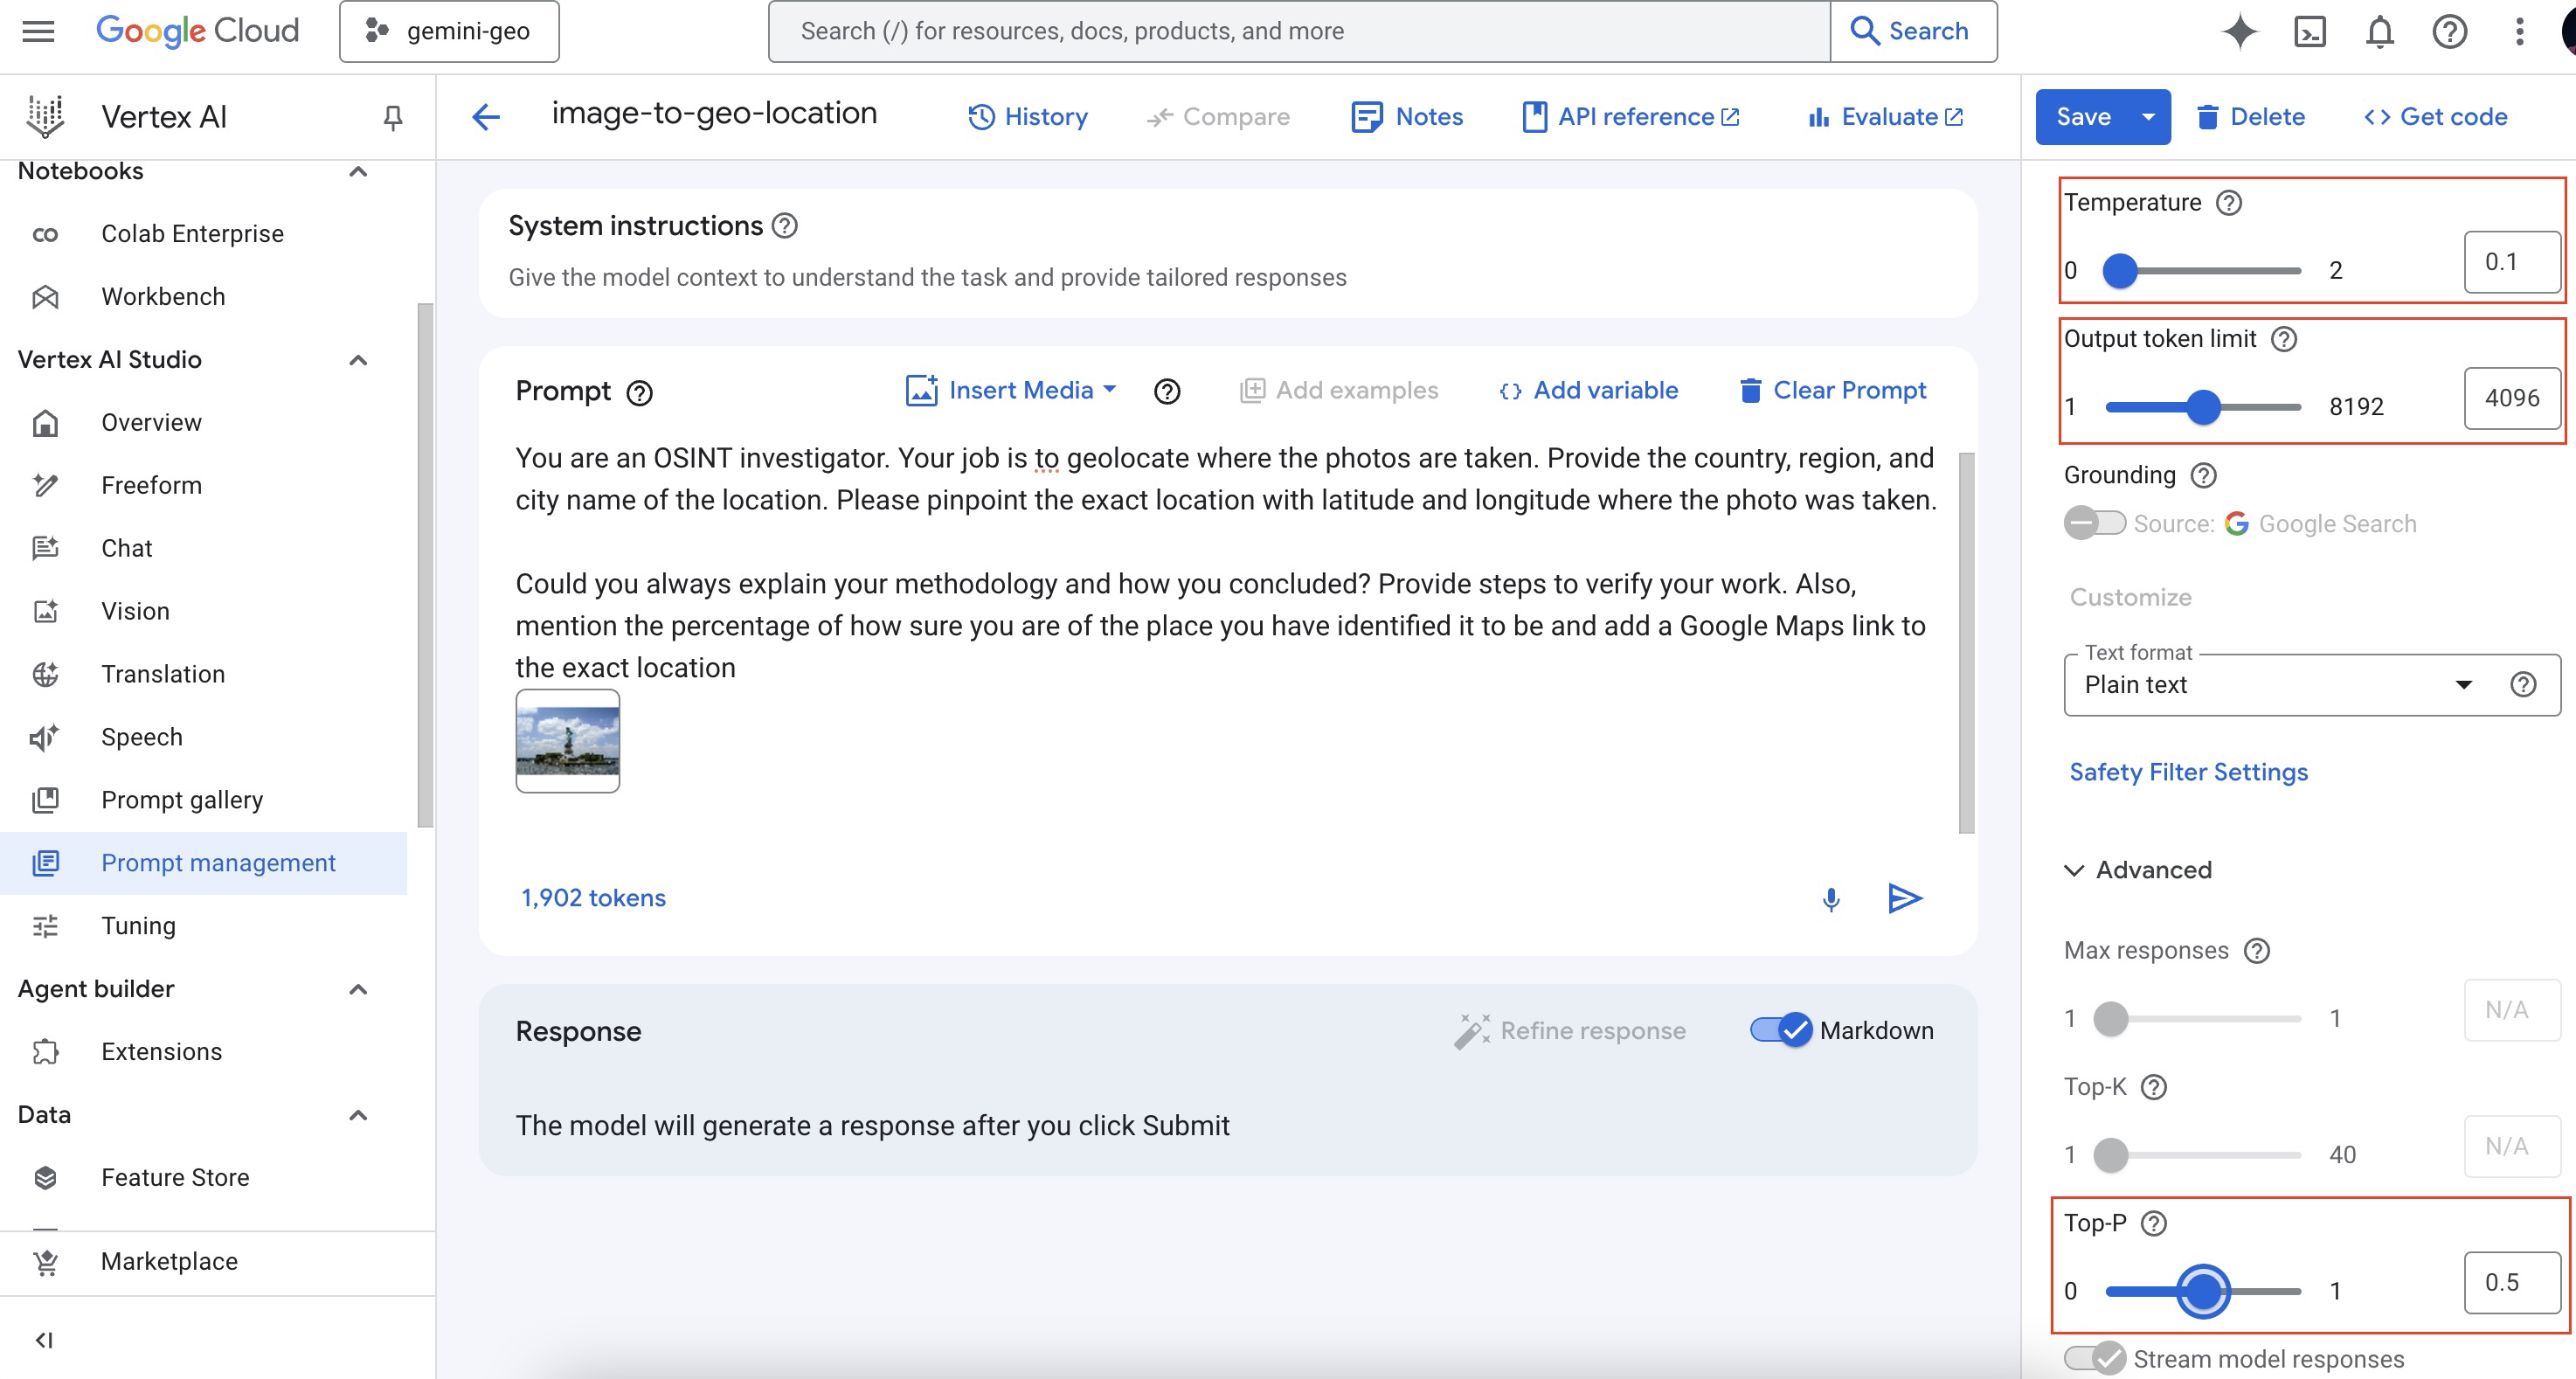
- Hurray! The basic photo/image to Geo location is working. Now, you will change some settings to make it better. You can go back to the prompt editing page by clicking the
Prompt Nameif you are on thePrompt managementpage.
- In terms of configurations, for Gemini 2.0 there are 3 options you can configure. Those four are explained in plain words below:
- Temperature (Randomness/Creativity/Spice): Imagine a roulette wheel (randomness). A high temperature increases the spin's randomness, affecting the chosen word (output).
- Output Token Limit (Length): This is like a set word limit (length) for your text. It controls how many words the LLM generates in total.
- Top P (Probability): This is like a probability wheel (probability). It influences the LLM to pick the next word based on its likelihood (probability), not just being the most likely.
Below is a configuration you can try out, the right settings for this configuration depend on how you want the output to be shaped by Gemini:
- It is also important to set up the
Safety Settingscorrectly as per your use case, for now, we will set it at maximum safety (Responsible AI). As seen below, the safety settings (found on the right sidebar are self-explanatory)

- You can also tweak the prompt text to make it better.
You can play around with the prompt and make it more flexible or more specific as per your goals.
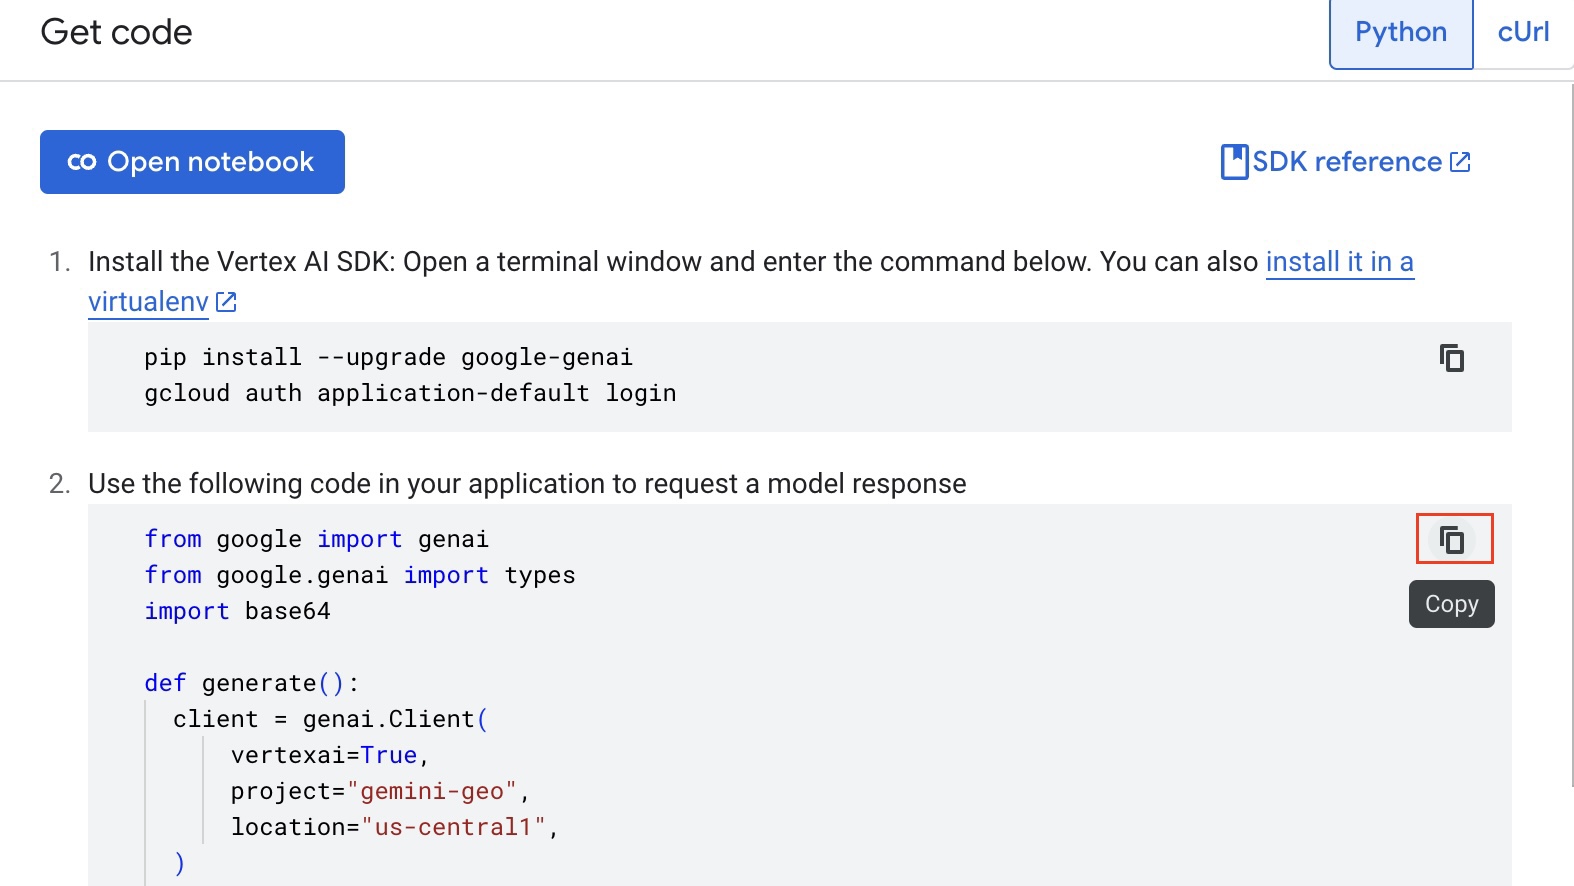
The optional code step is next.
- If you want to create an API for the image to geo location guesser or want to have more control over what the LLM is called, you can generate code and run it on a Google Cloud Platform service like Google Cloud Run. To generate code, click the
<> Get Codelink which shows a slider on the right side as follows:
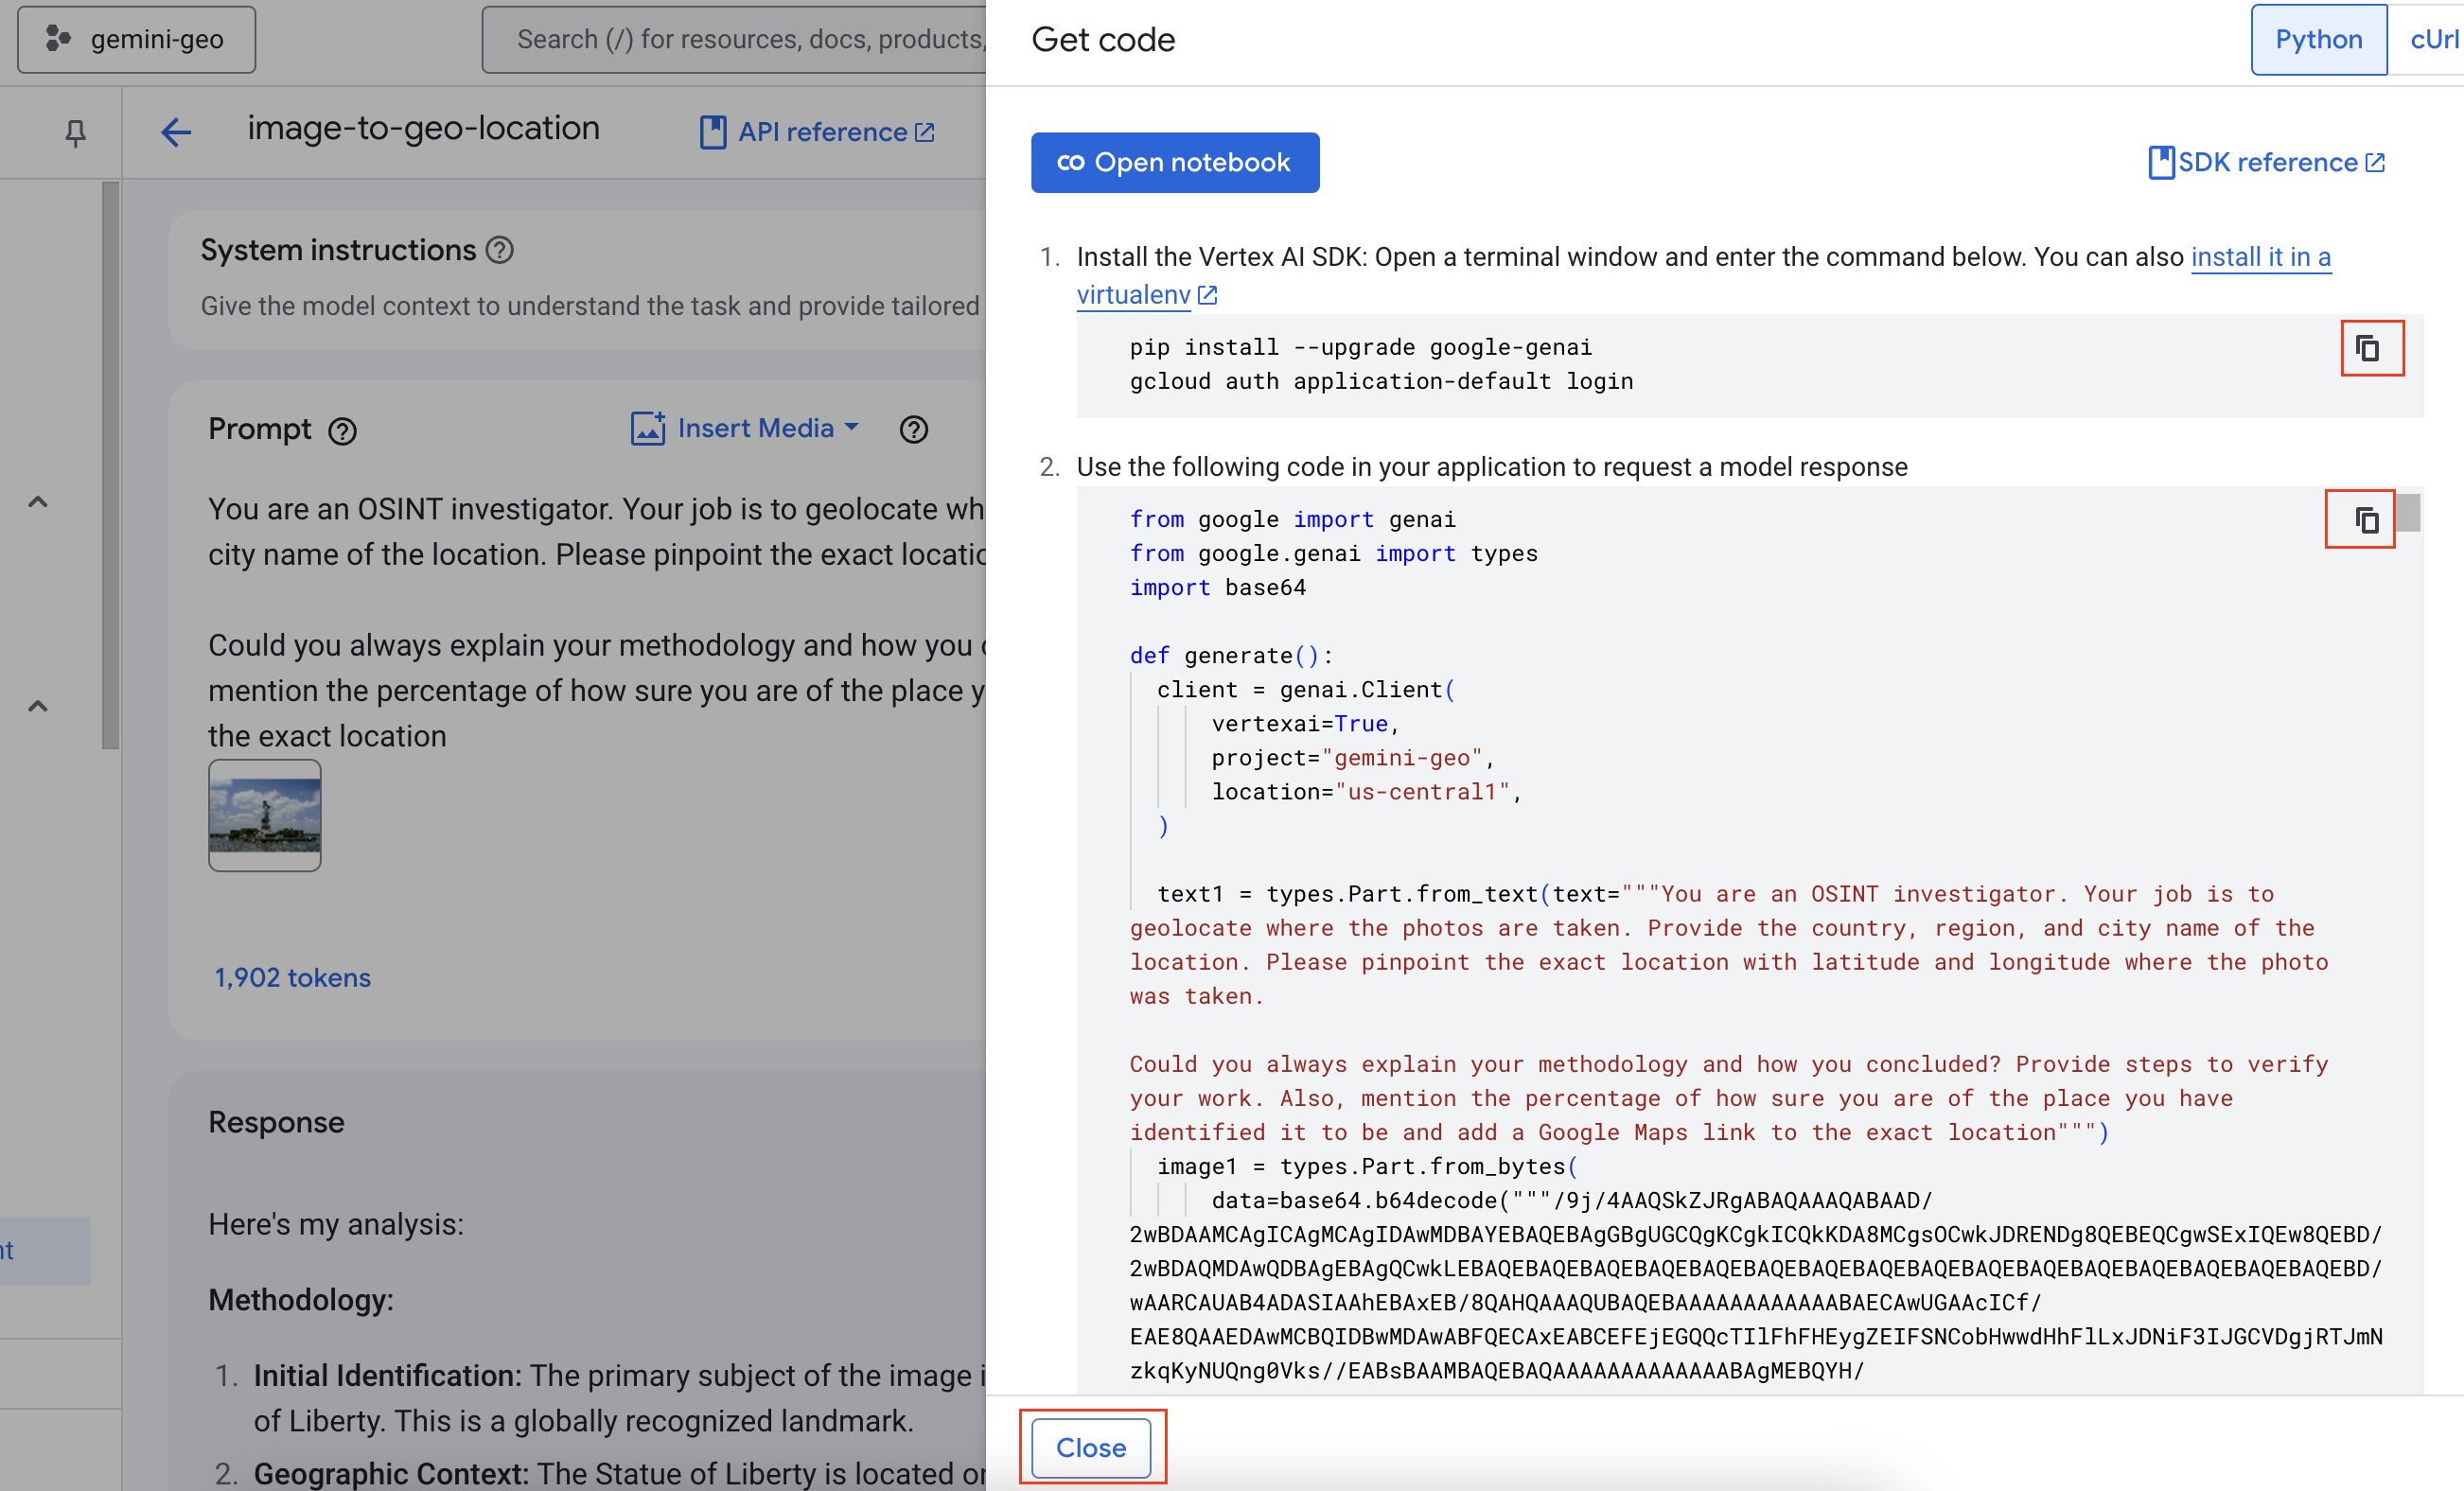
For this workshop, you will use the Python code and try it out. To continue, you will use Cloud shell and Cloud shell editor. You can close the sample code slider, by clicking Close on the bottom left of the slider.
- Click
Activate Cloud Shelltoward the top right corner of the screen as seen below:
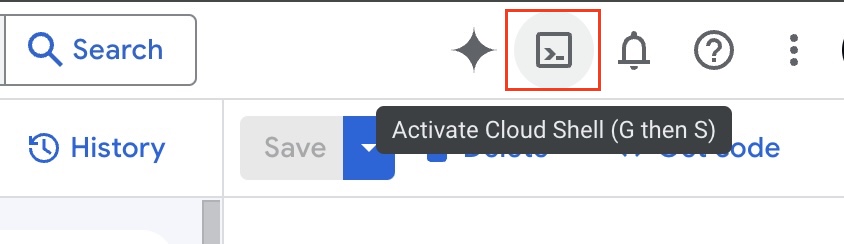
You can also type G then S on your keyborad. You might need to autorise the Cloud Shell to access your Google Cloud resources.
- It might take some time for the editor to load. In the Cloud shell window after it loads, click
Open Editor:

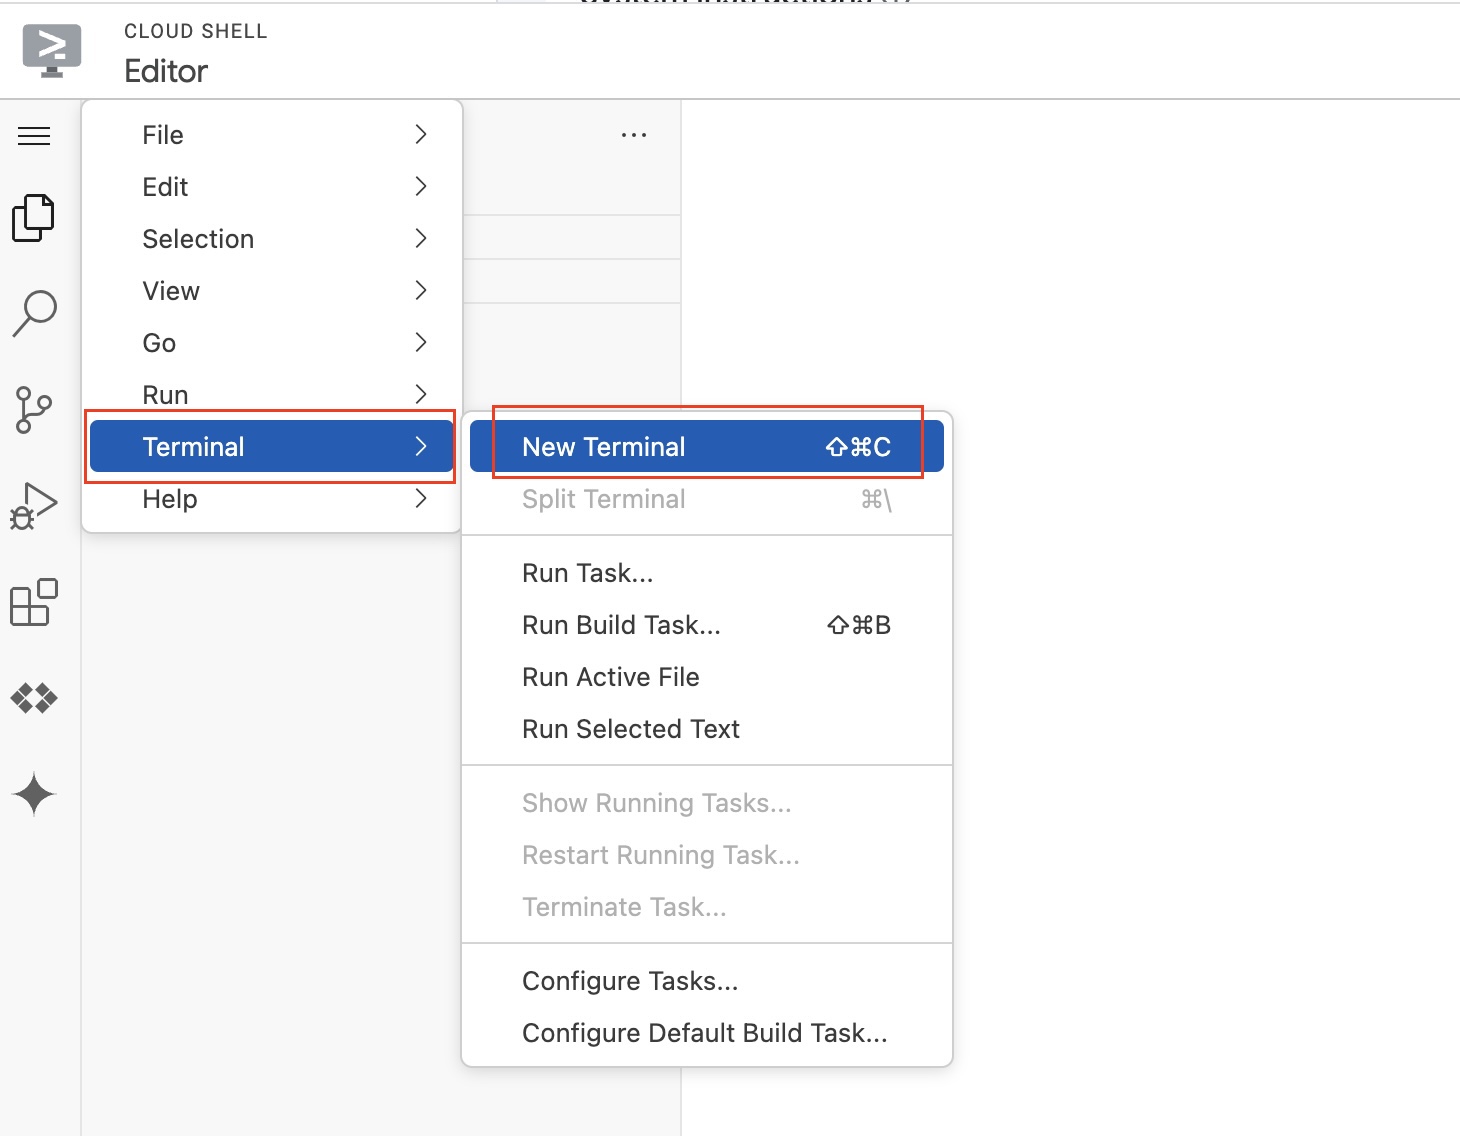
- This will take some time and open up the Google Cloud Shell Editor which looks very similar to VS Code. In the Editor click
Hamburger Menu > Terminal > New Terminalas follow:
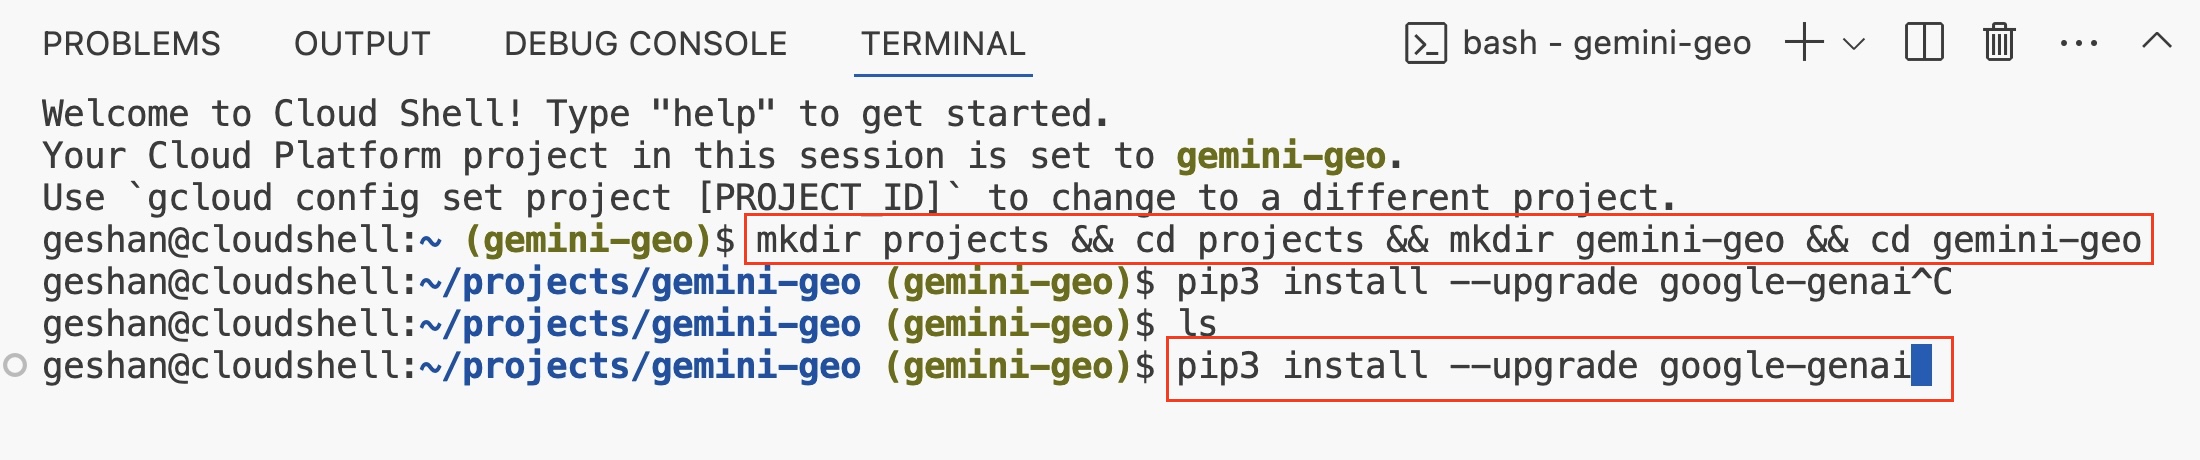
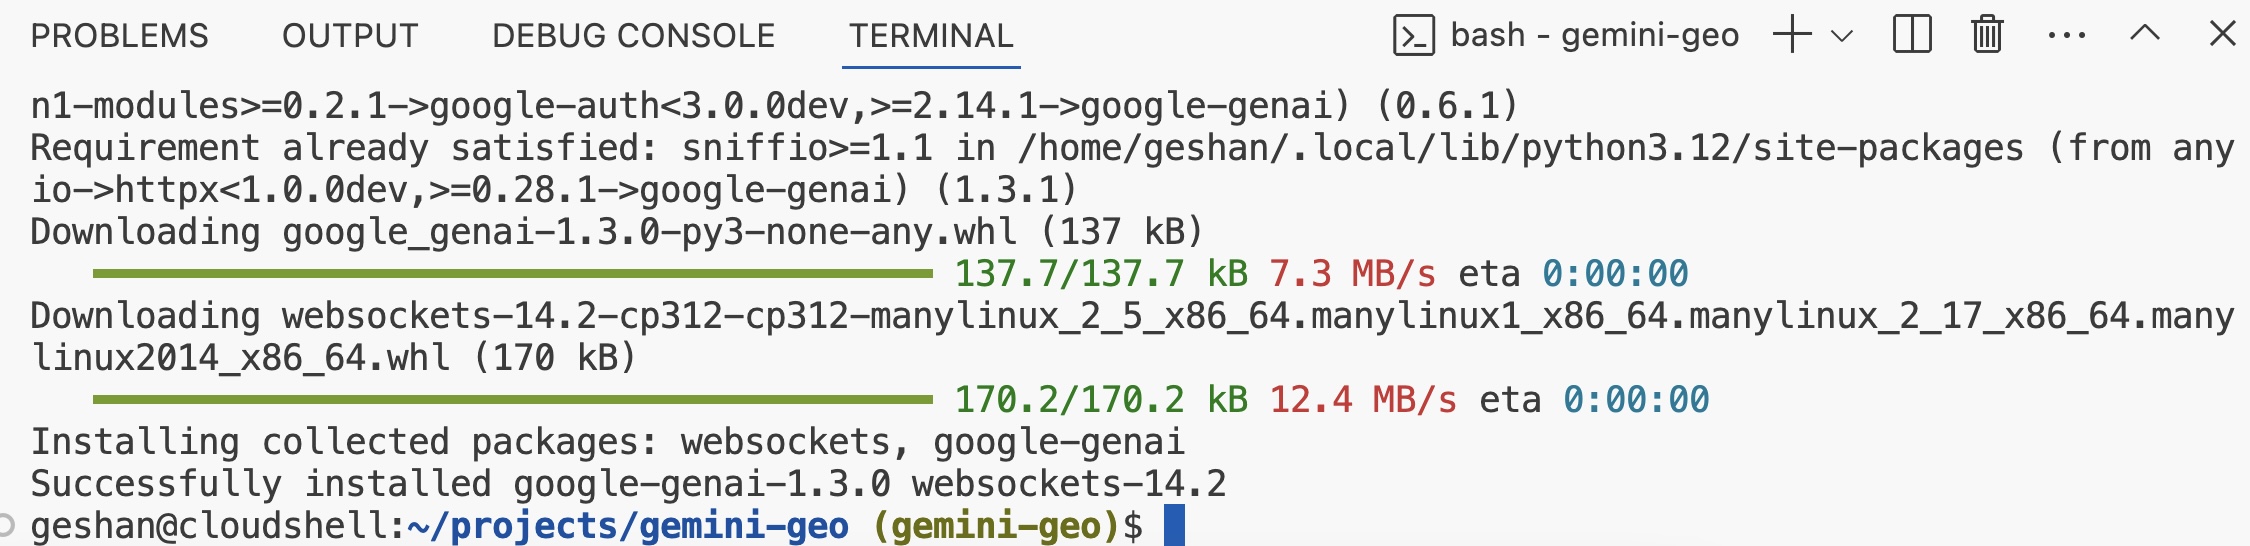
- In the editor's teminal, execute
mkdir projects && cd projects && mkdir gemini-geo && cd gemini-geoand thenpip3 install --upgrade google-genaito install thegoogle-genaiPython package:
- After
google-genaiPython package is installed it will look like the below:
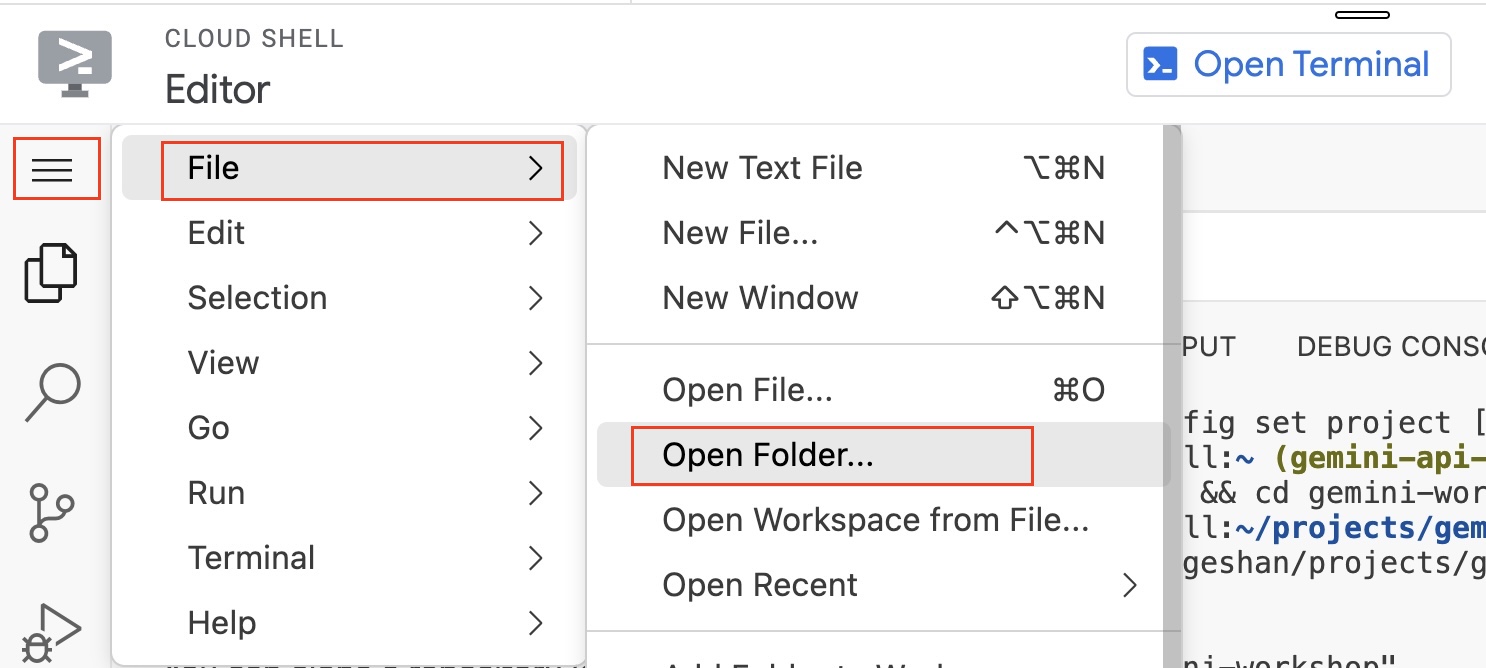
- Then, you will load the folder in the project, go to
Hamburger Menu > File > Open Folder:
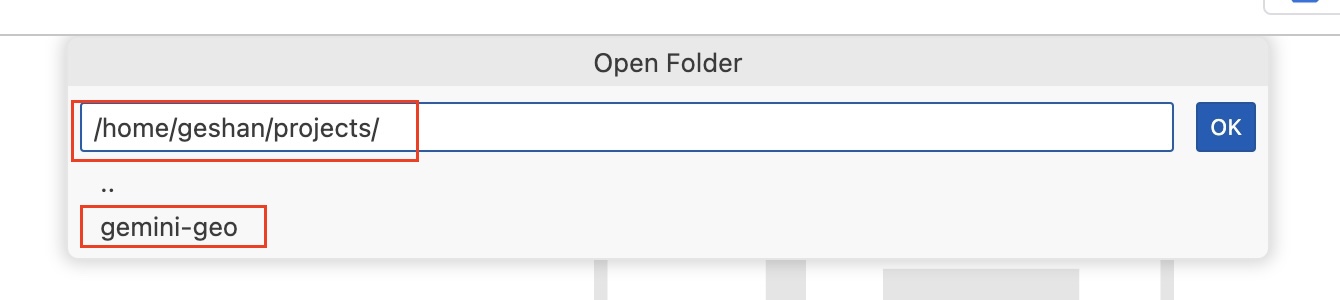
- Then type in
projects/gemand select thegemini-geooption and clickOK:
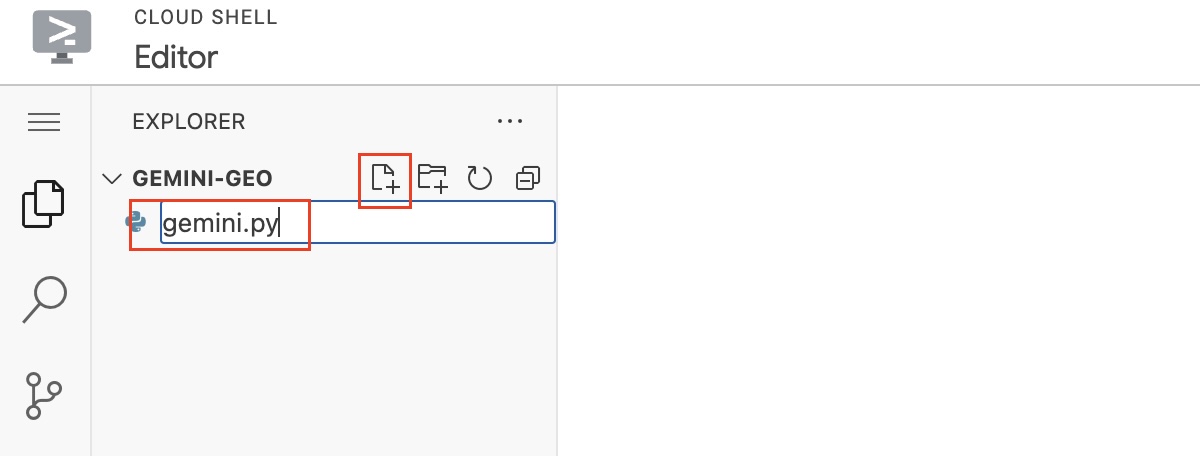
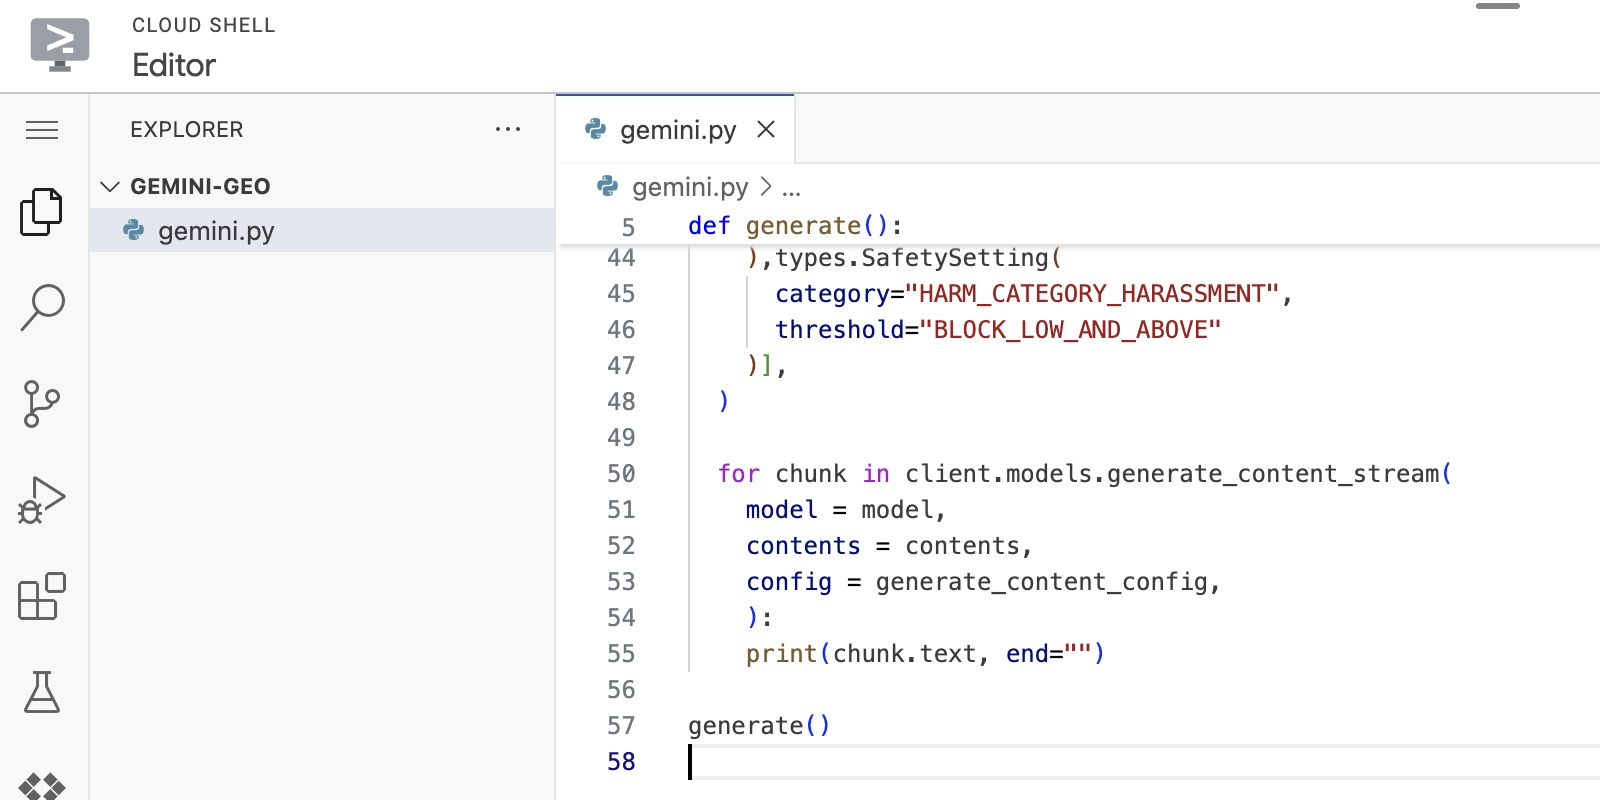
- It will load the folder on the Cloud Shell editor, after that, to add a new file click the
file+icon besidesGEMINI-WORKSHOPand name itgemini.py
- For the contents of the gemini.py, click
<>GET CODEon the Vertex AI Editor screen, while on thePythonoption, copy the code into a file calledgemini.py
- Paste the code in the
gemini.pyempty file and save it:
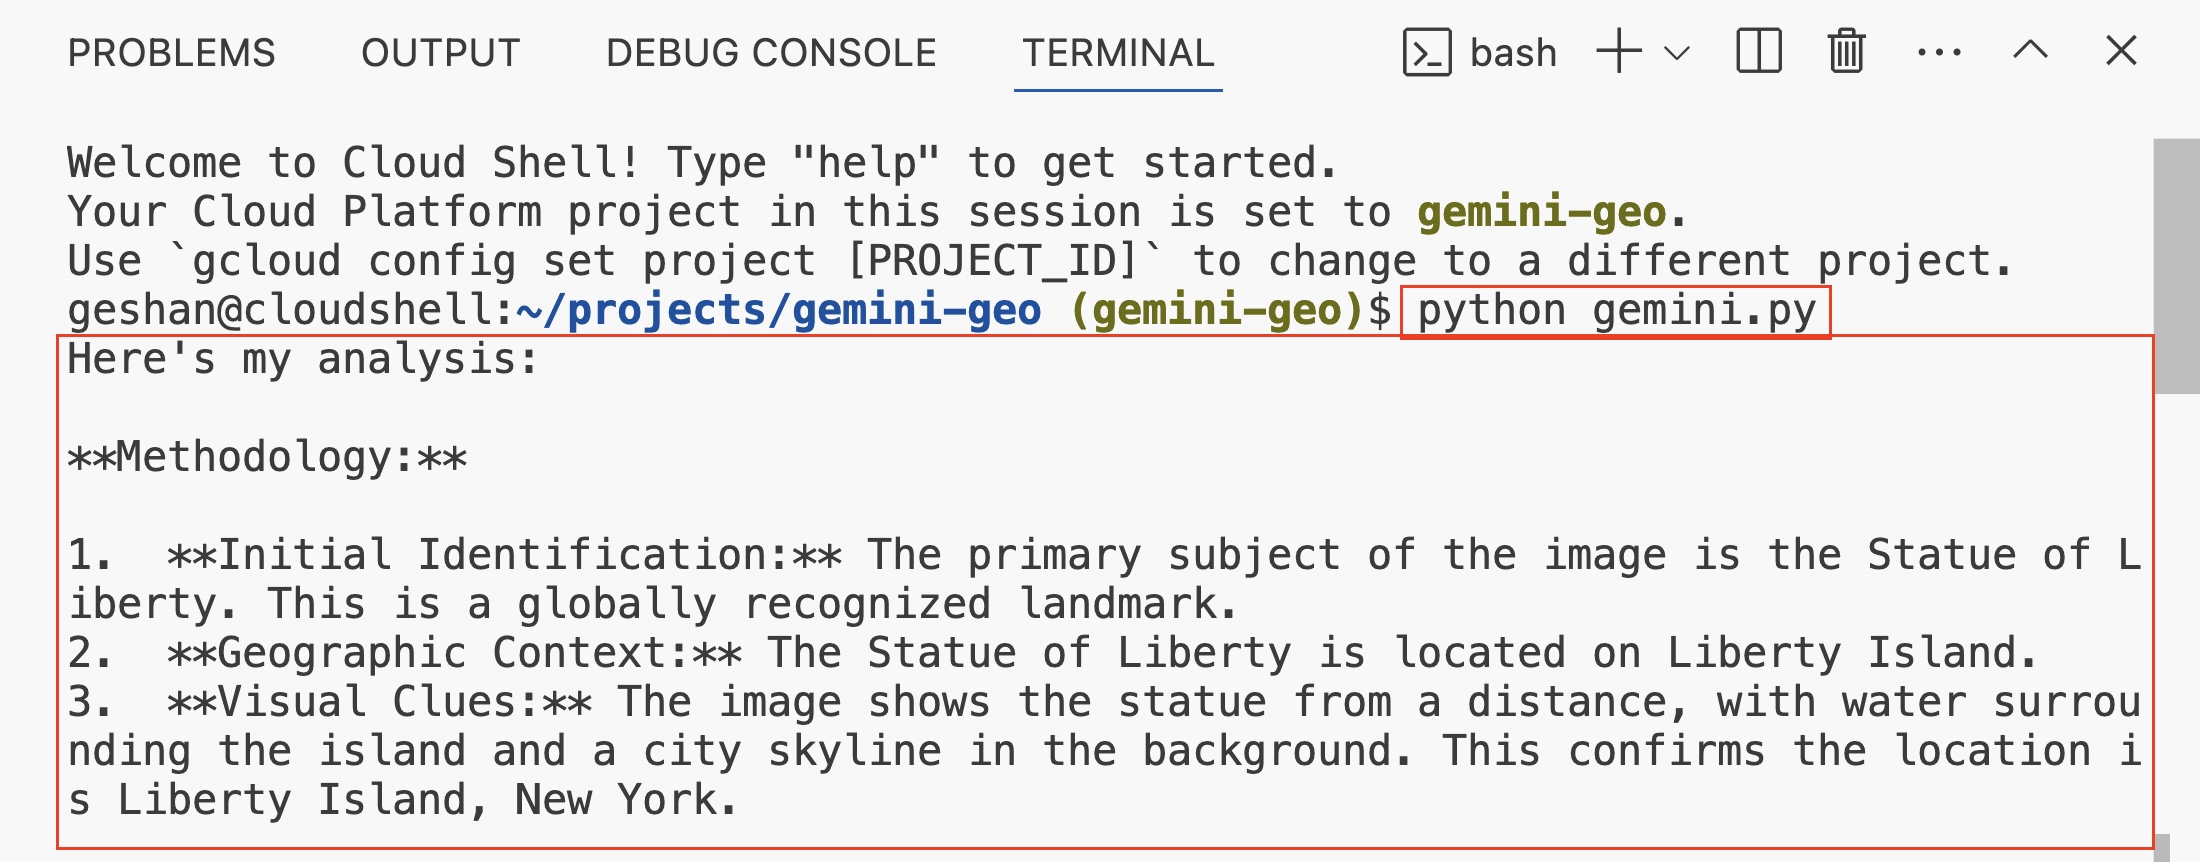
- To run the code and test it out, again open the terminal from
Hamburger Menu > Terminal > New Terminaland type inpython gemini.pythen hit enter. It will ask you toAuthoriseif you have not already done so.:
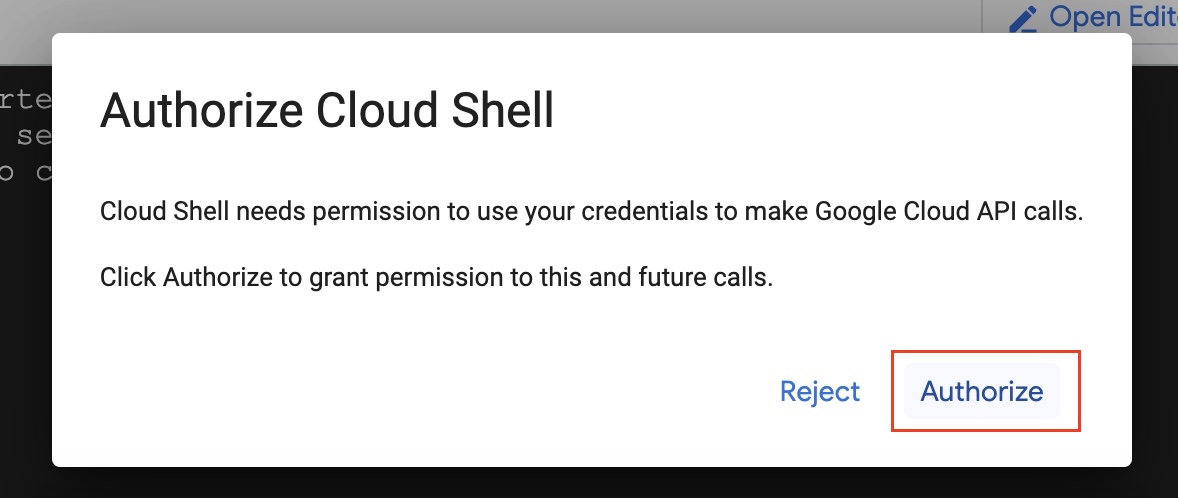
After authorisation the code will run and give an outupt like the below:
Congrats! You are a Gemini and Vertex AI novice now :). You can close the Cloud Shell Editor.
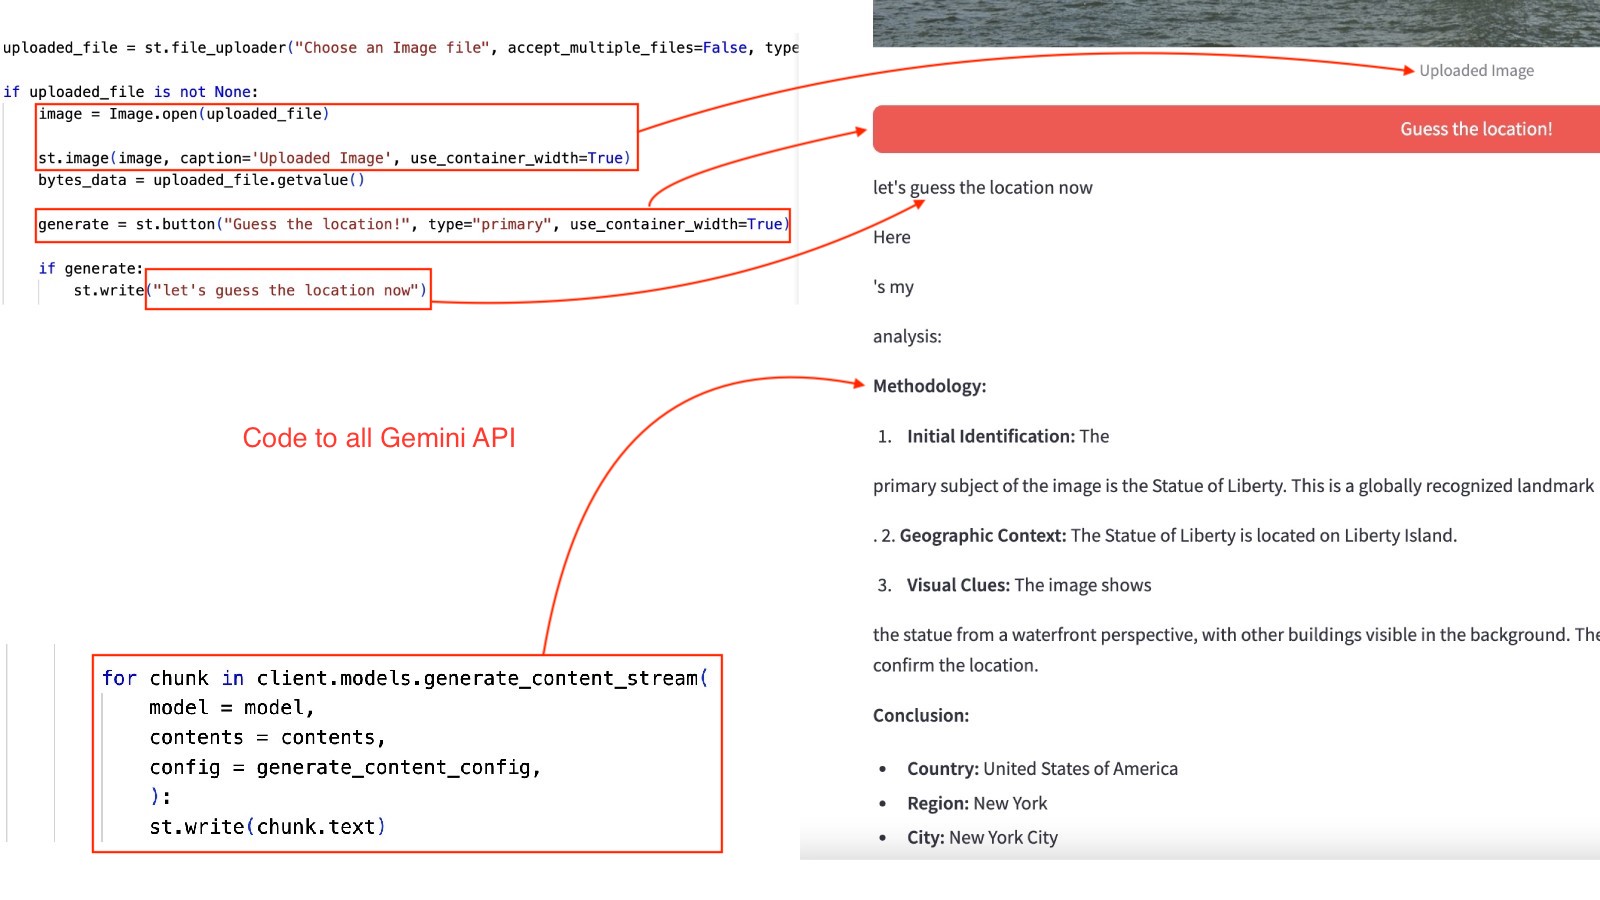
- Let's go quiclky through the code of the Streamlit app:
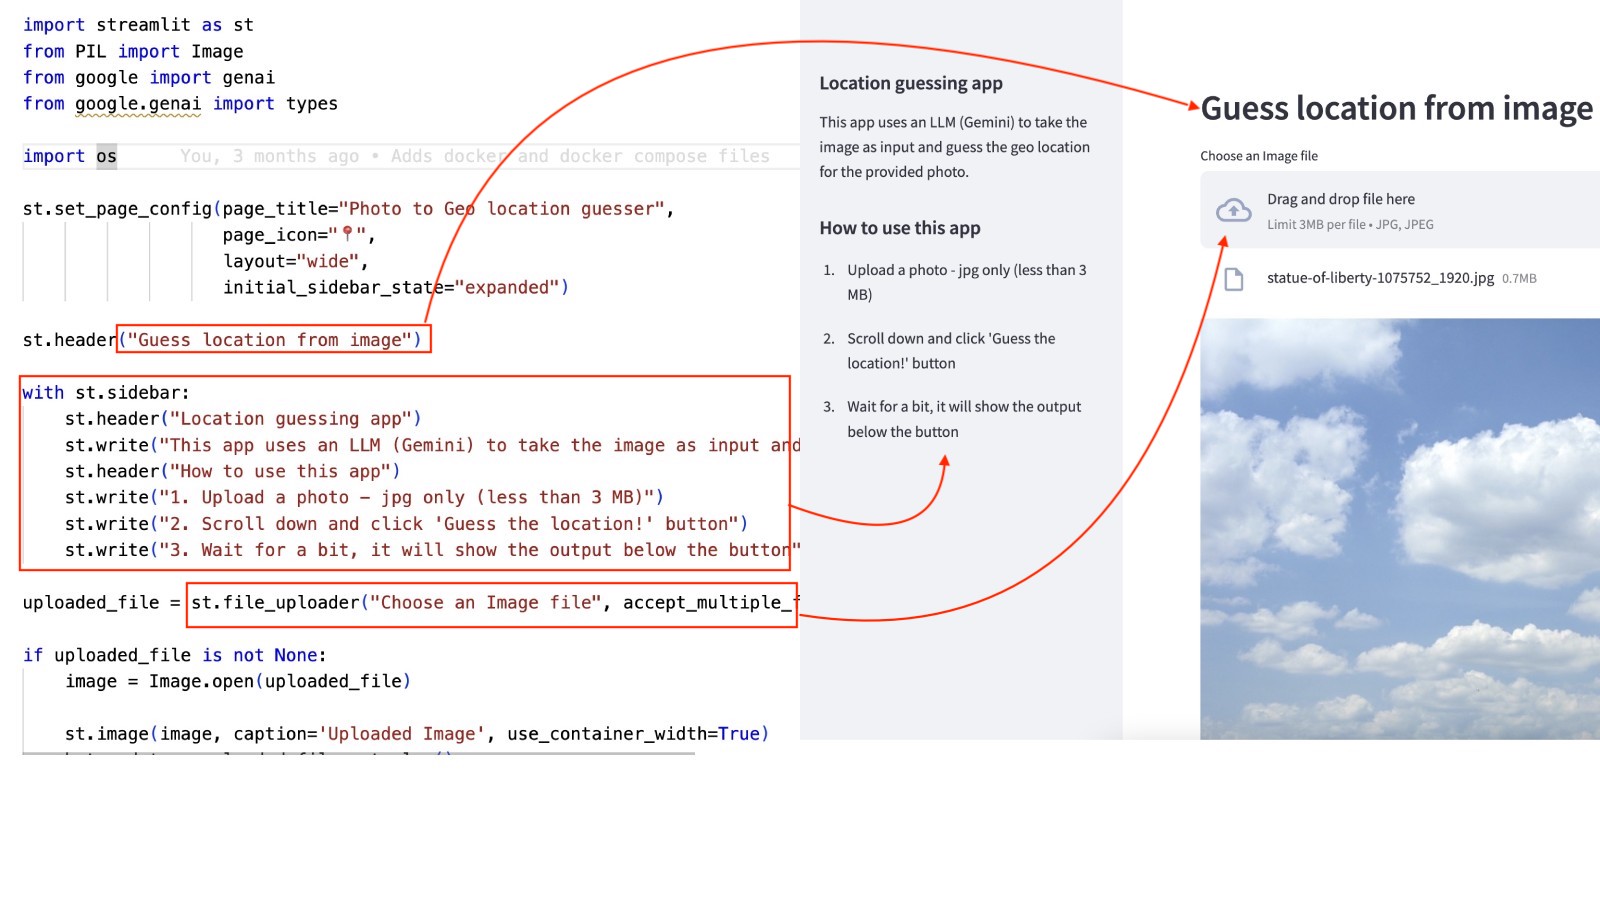
- After you upload the file, the Gemini API is called over Vertex AI to guess the location and show the output:
- To deploy your code with Streamlit on Google Cloud Run, go to the following GitHub repository and scroll down to the
Run on Google Cloudbutton as seen below:
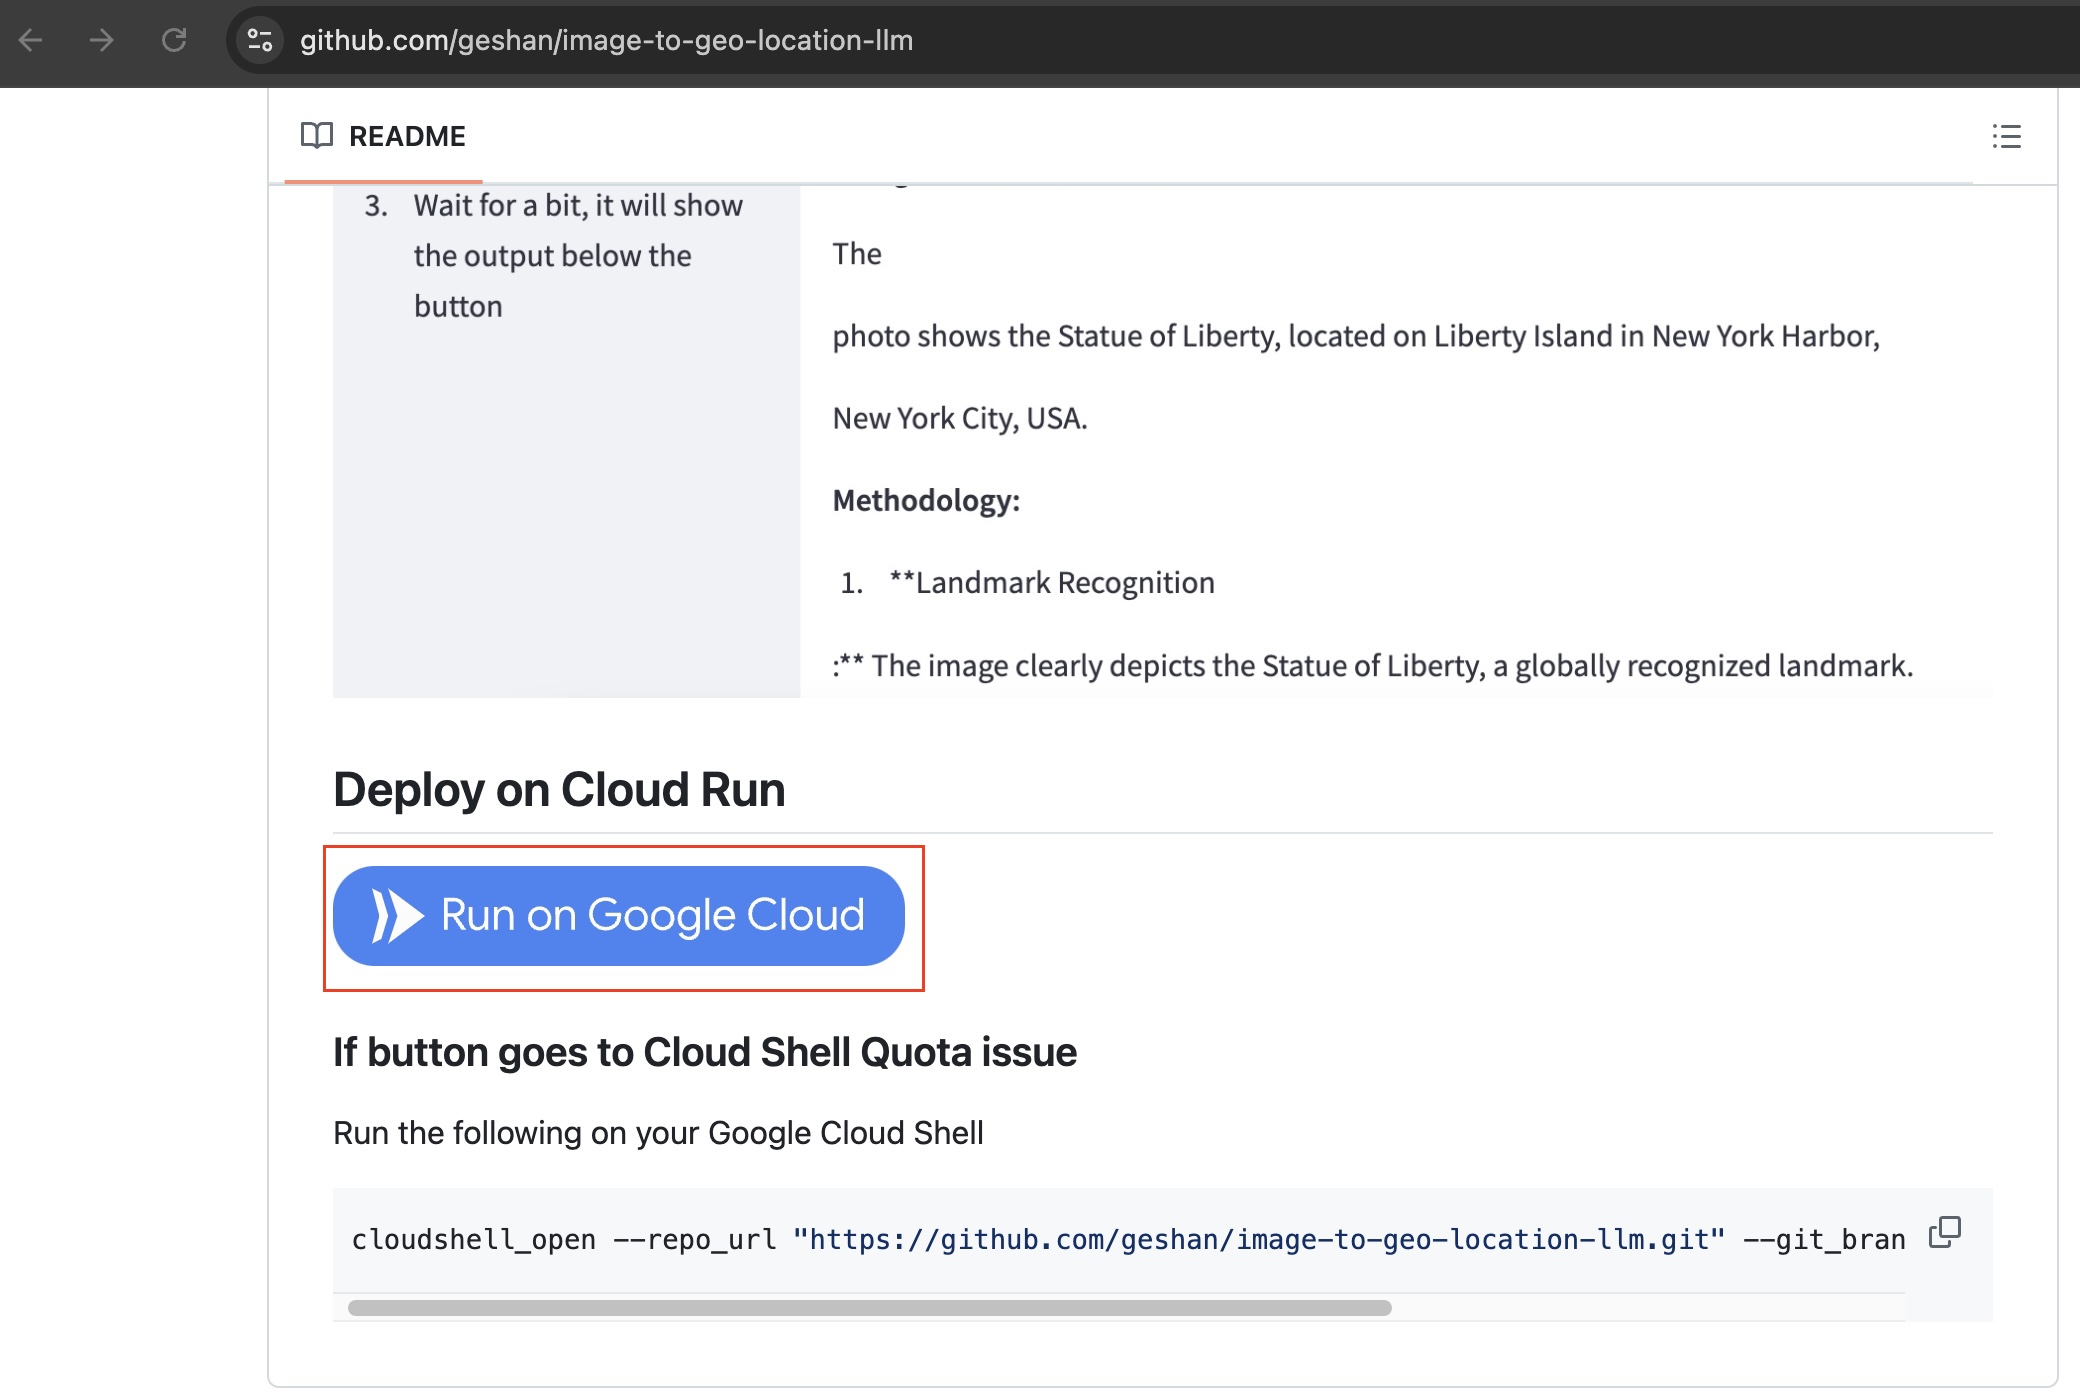
Then, click on the Run On Google Cloud blue button. The app code is in the streamlit_app.py file. We can discuss the code if you want to.
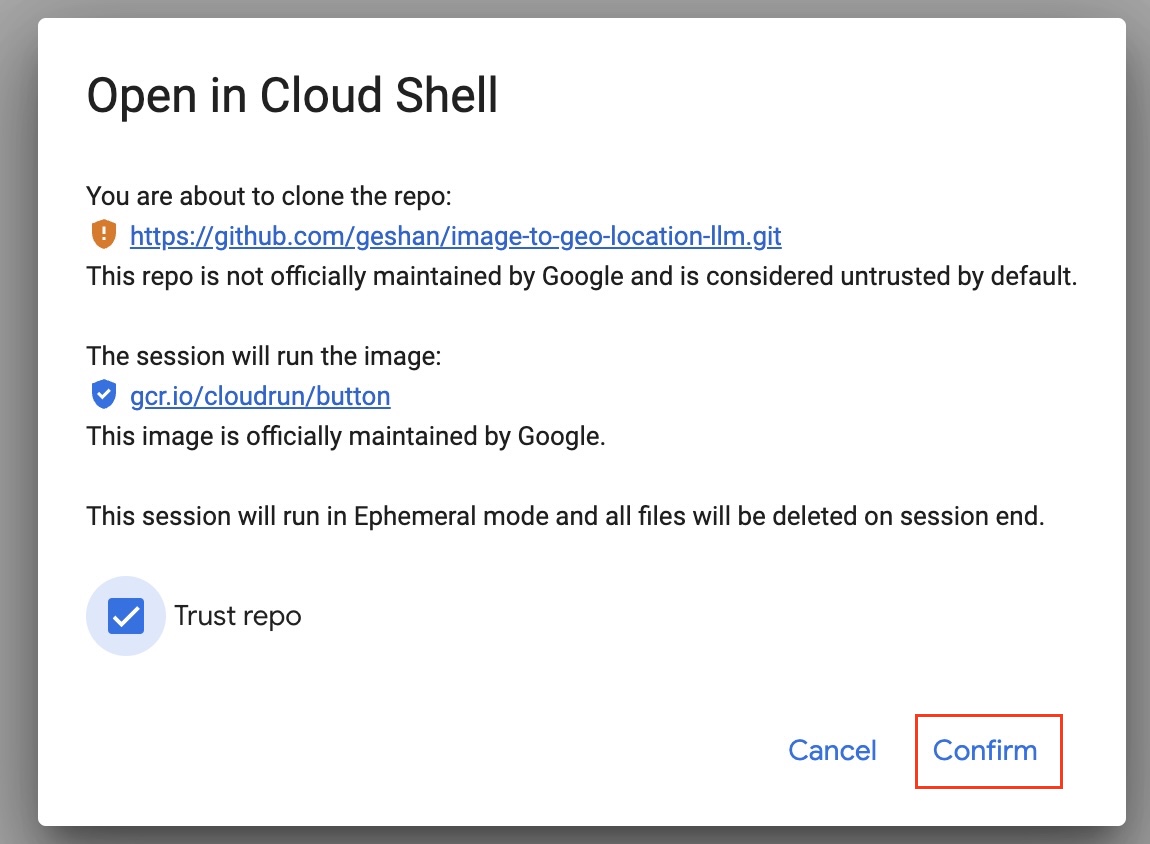
- After that, Then on the Google Cloud interface, check
Trust repoand then click onConfirmas seen below:
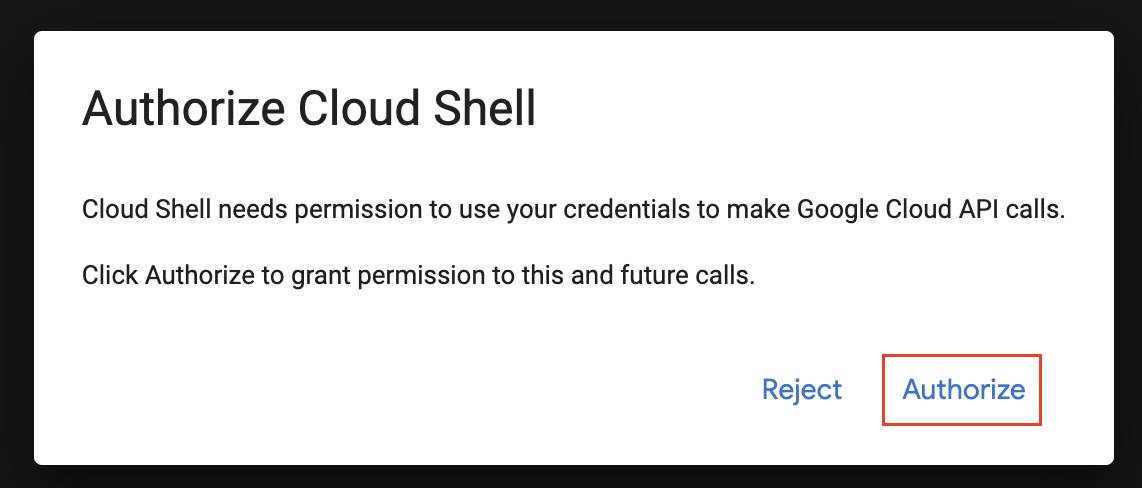
- You will need to authorize the Google Cloud Shell to access your Google Cloud resources. Click on
Authorize:
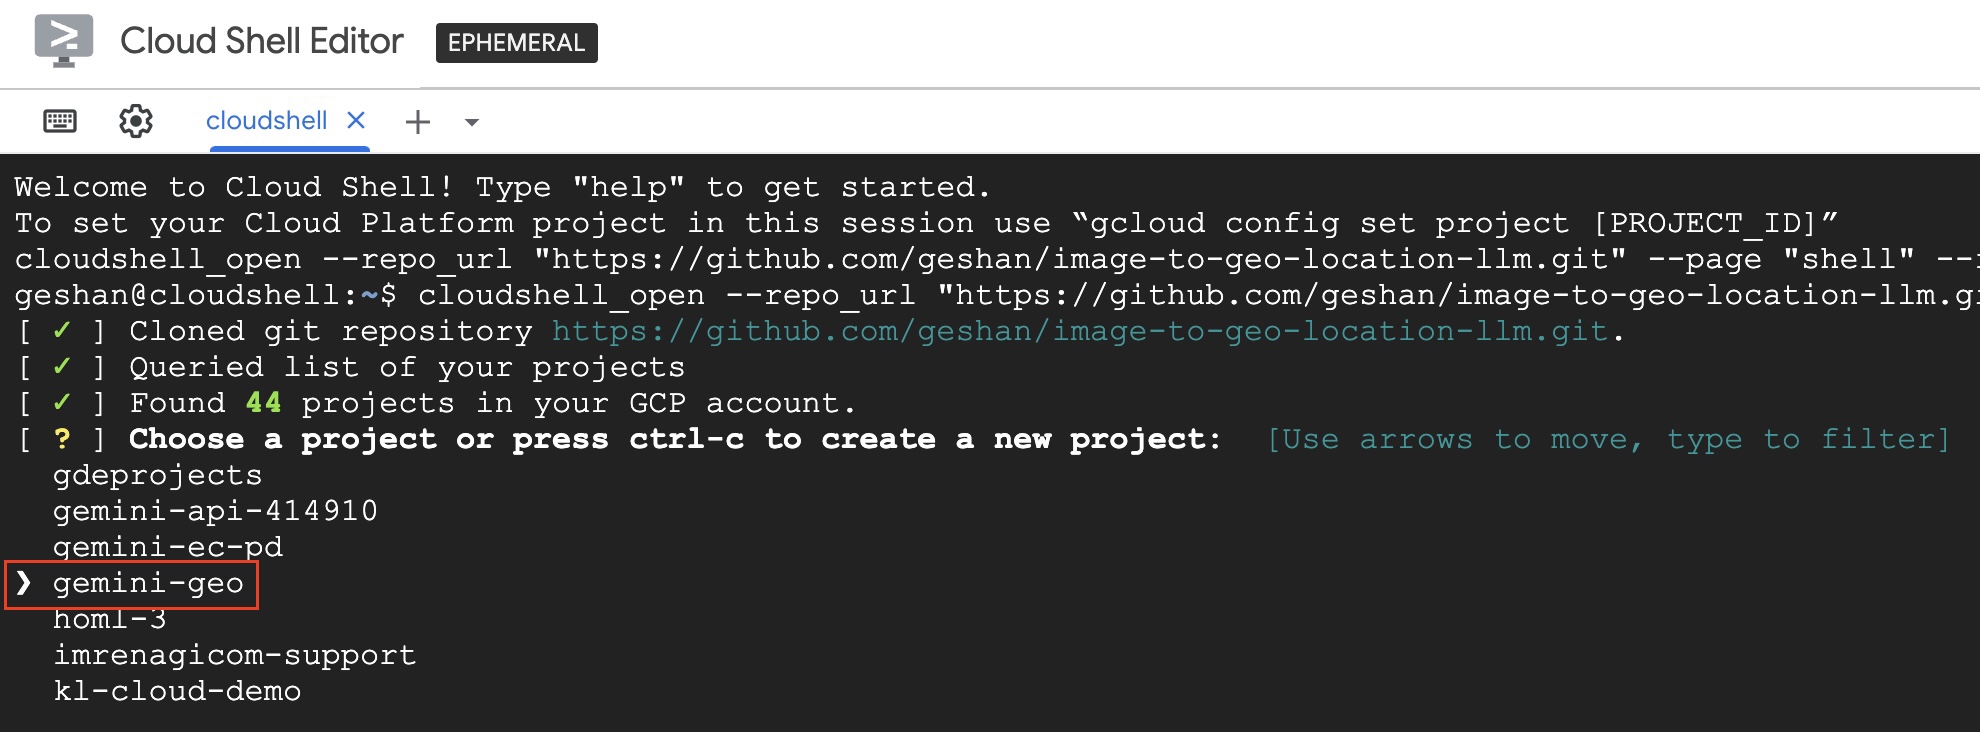
- It will provision your
Cloud Sell Machineand then run the script. It will ask you for the project, select the project you created in the first stepgemini-geoand hit enter.
(Authorize)
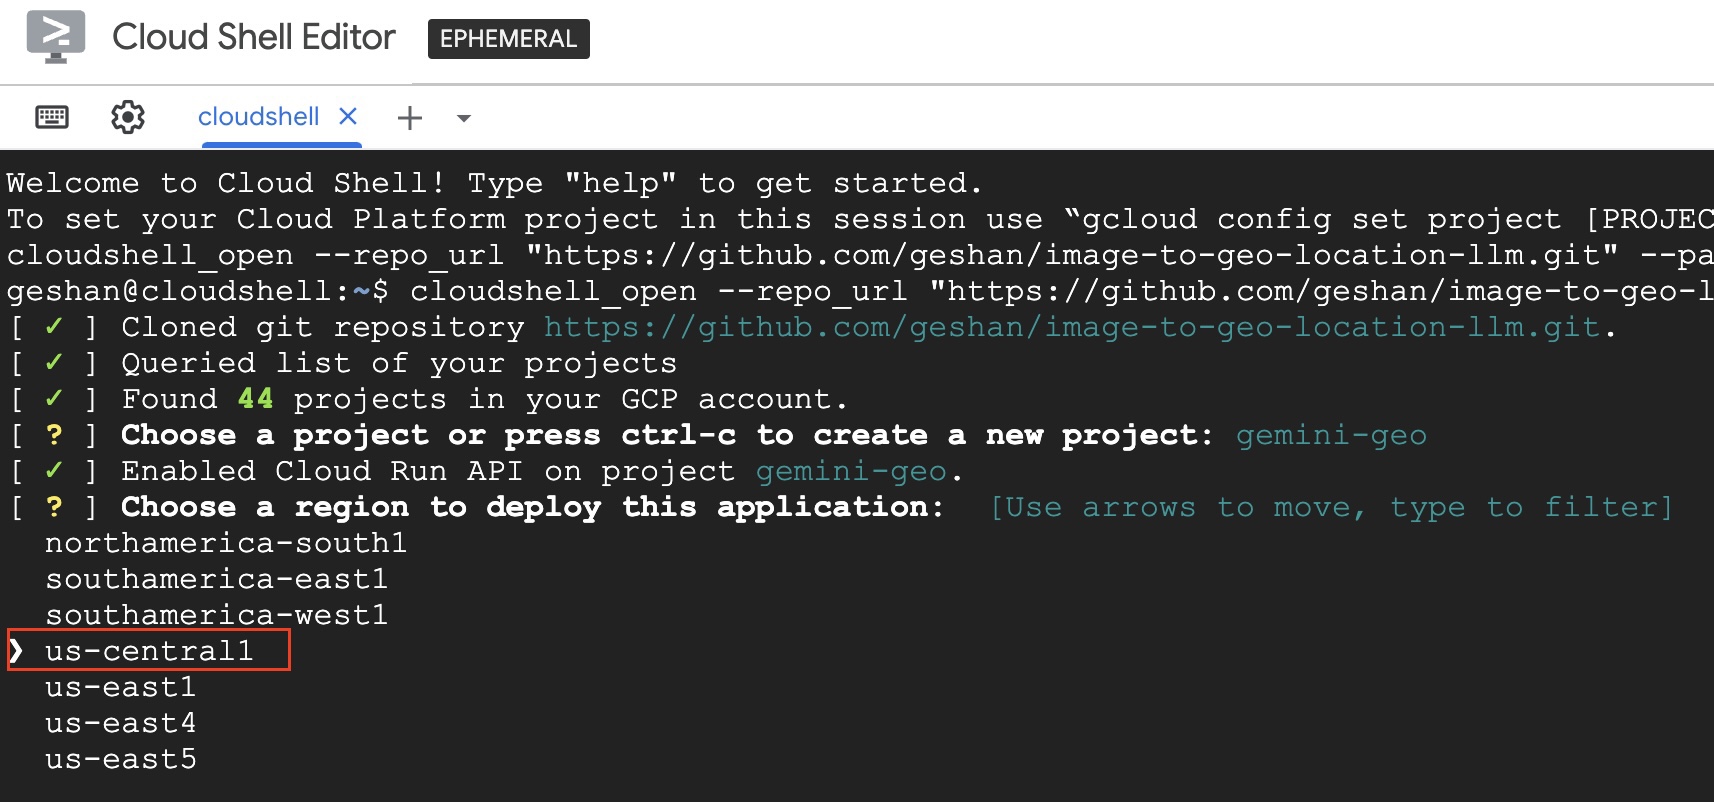
- Then for it will enable Cloud Run APIs on the project. After that, it will ask you to select a region, select
us-central1and hit enter.
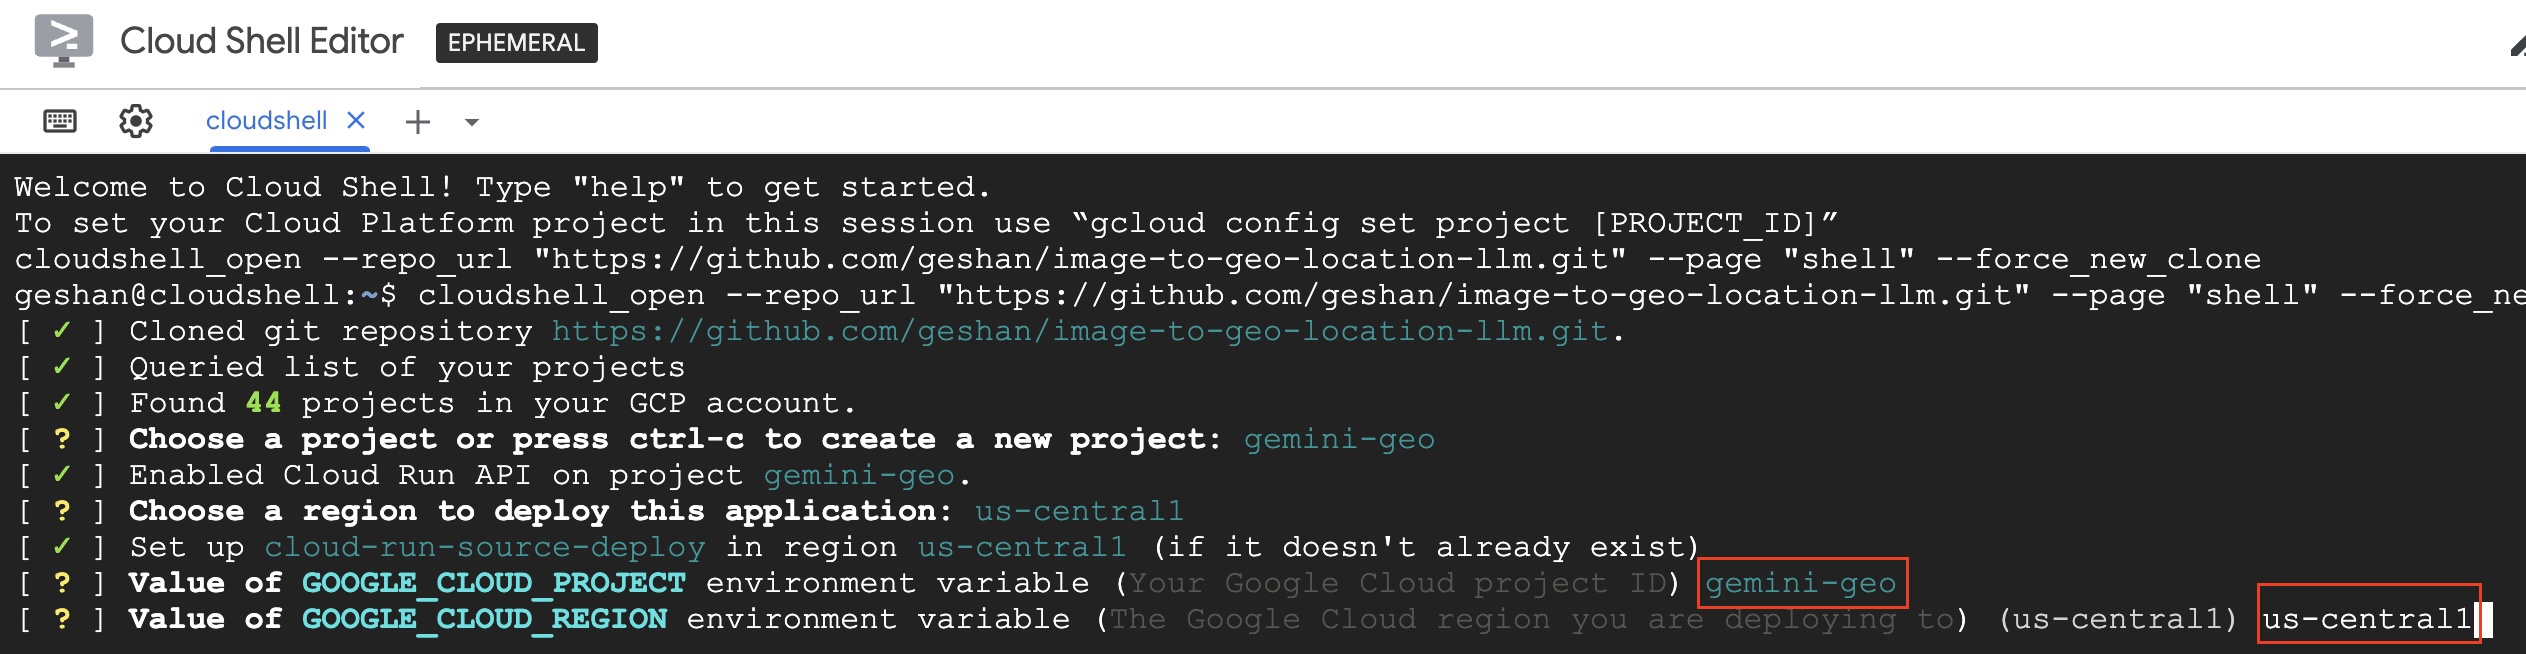
- After that, you will need to type in
gemini-geoor your project name and hit enter. Then again type inus-central1and hit enter. So that the environment varaibles are set up correctly for the Cloud Run Service.
- Then the Docker image will be built, pushed to container registry, and deployed to Cloud Run which will take some time. After that, you will get a URL like below:
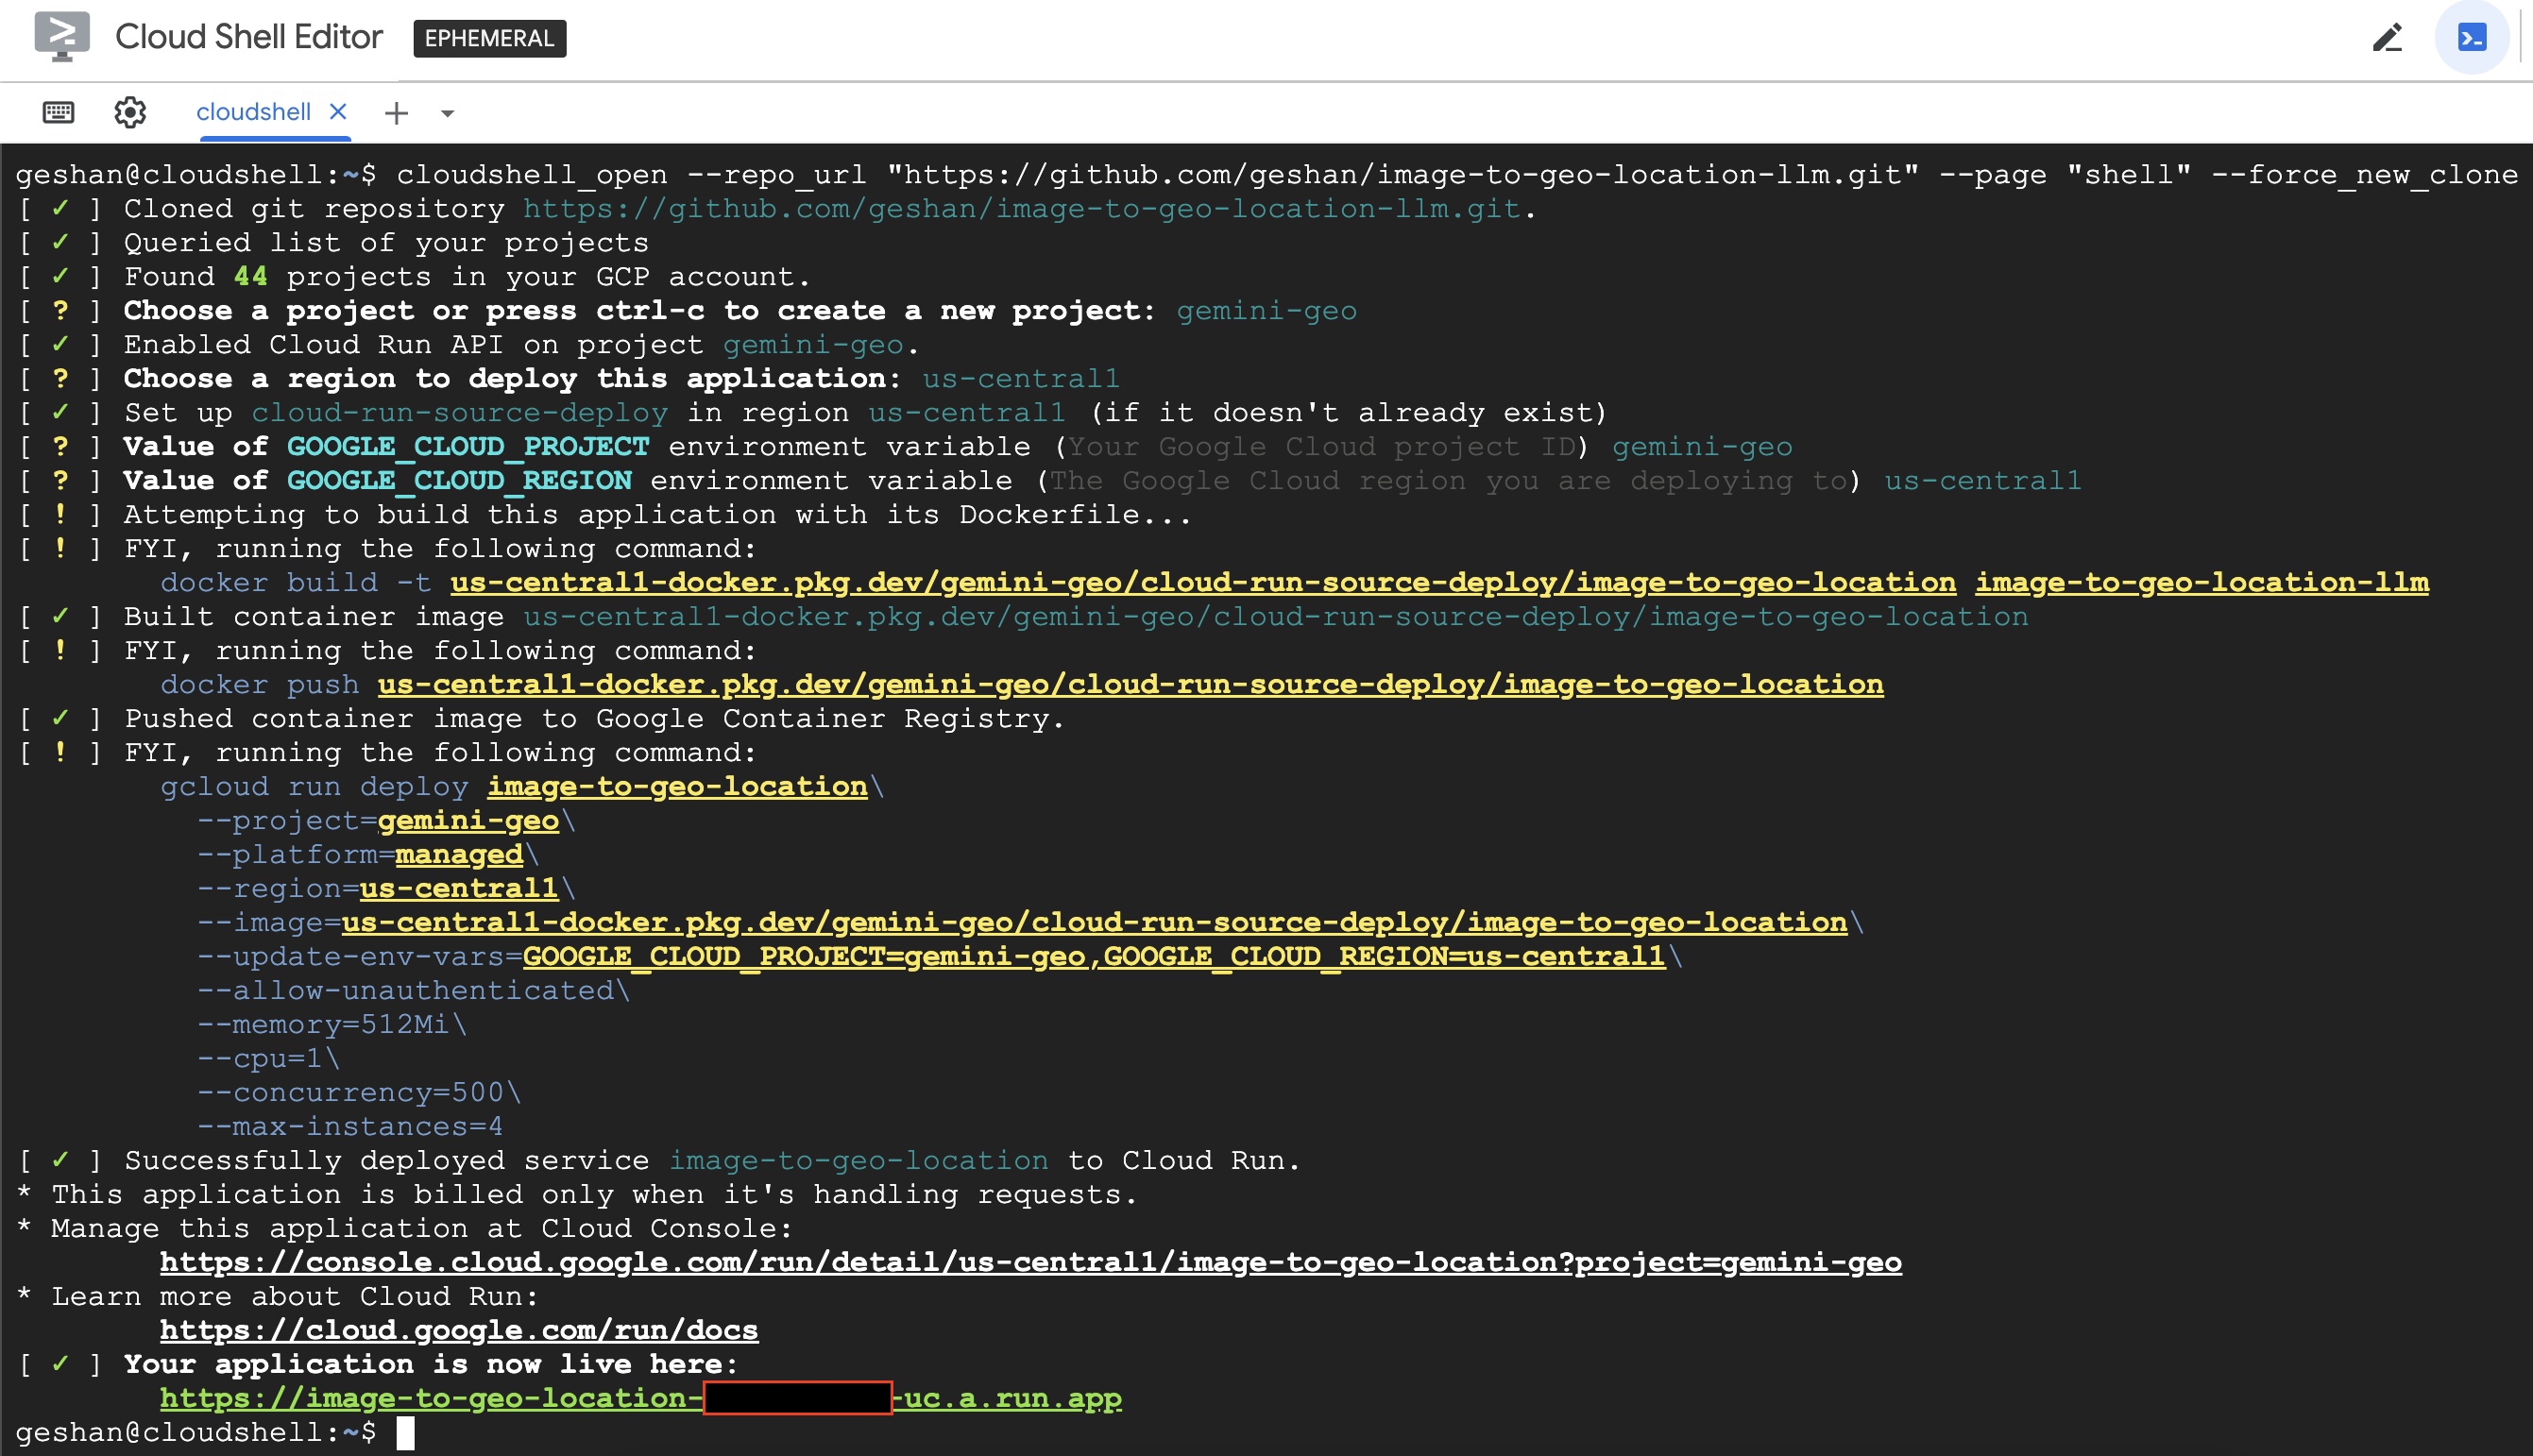
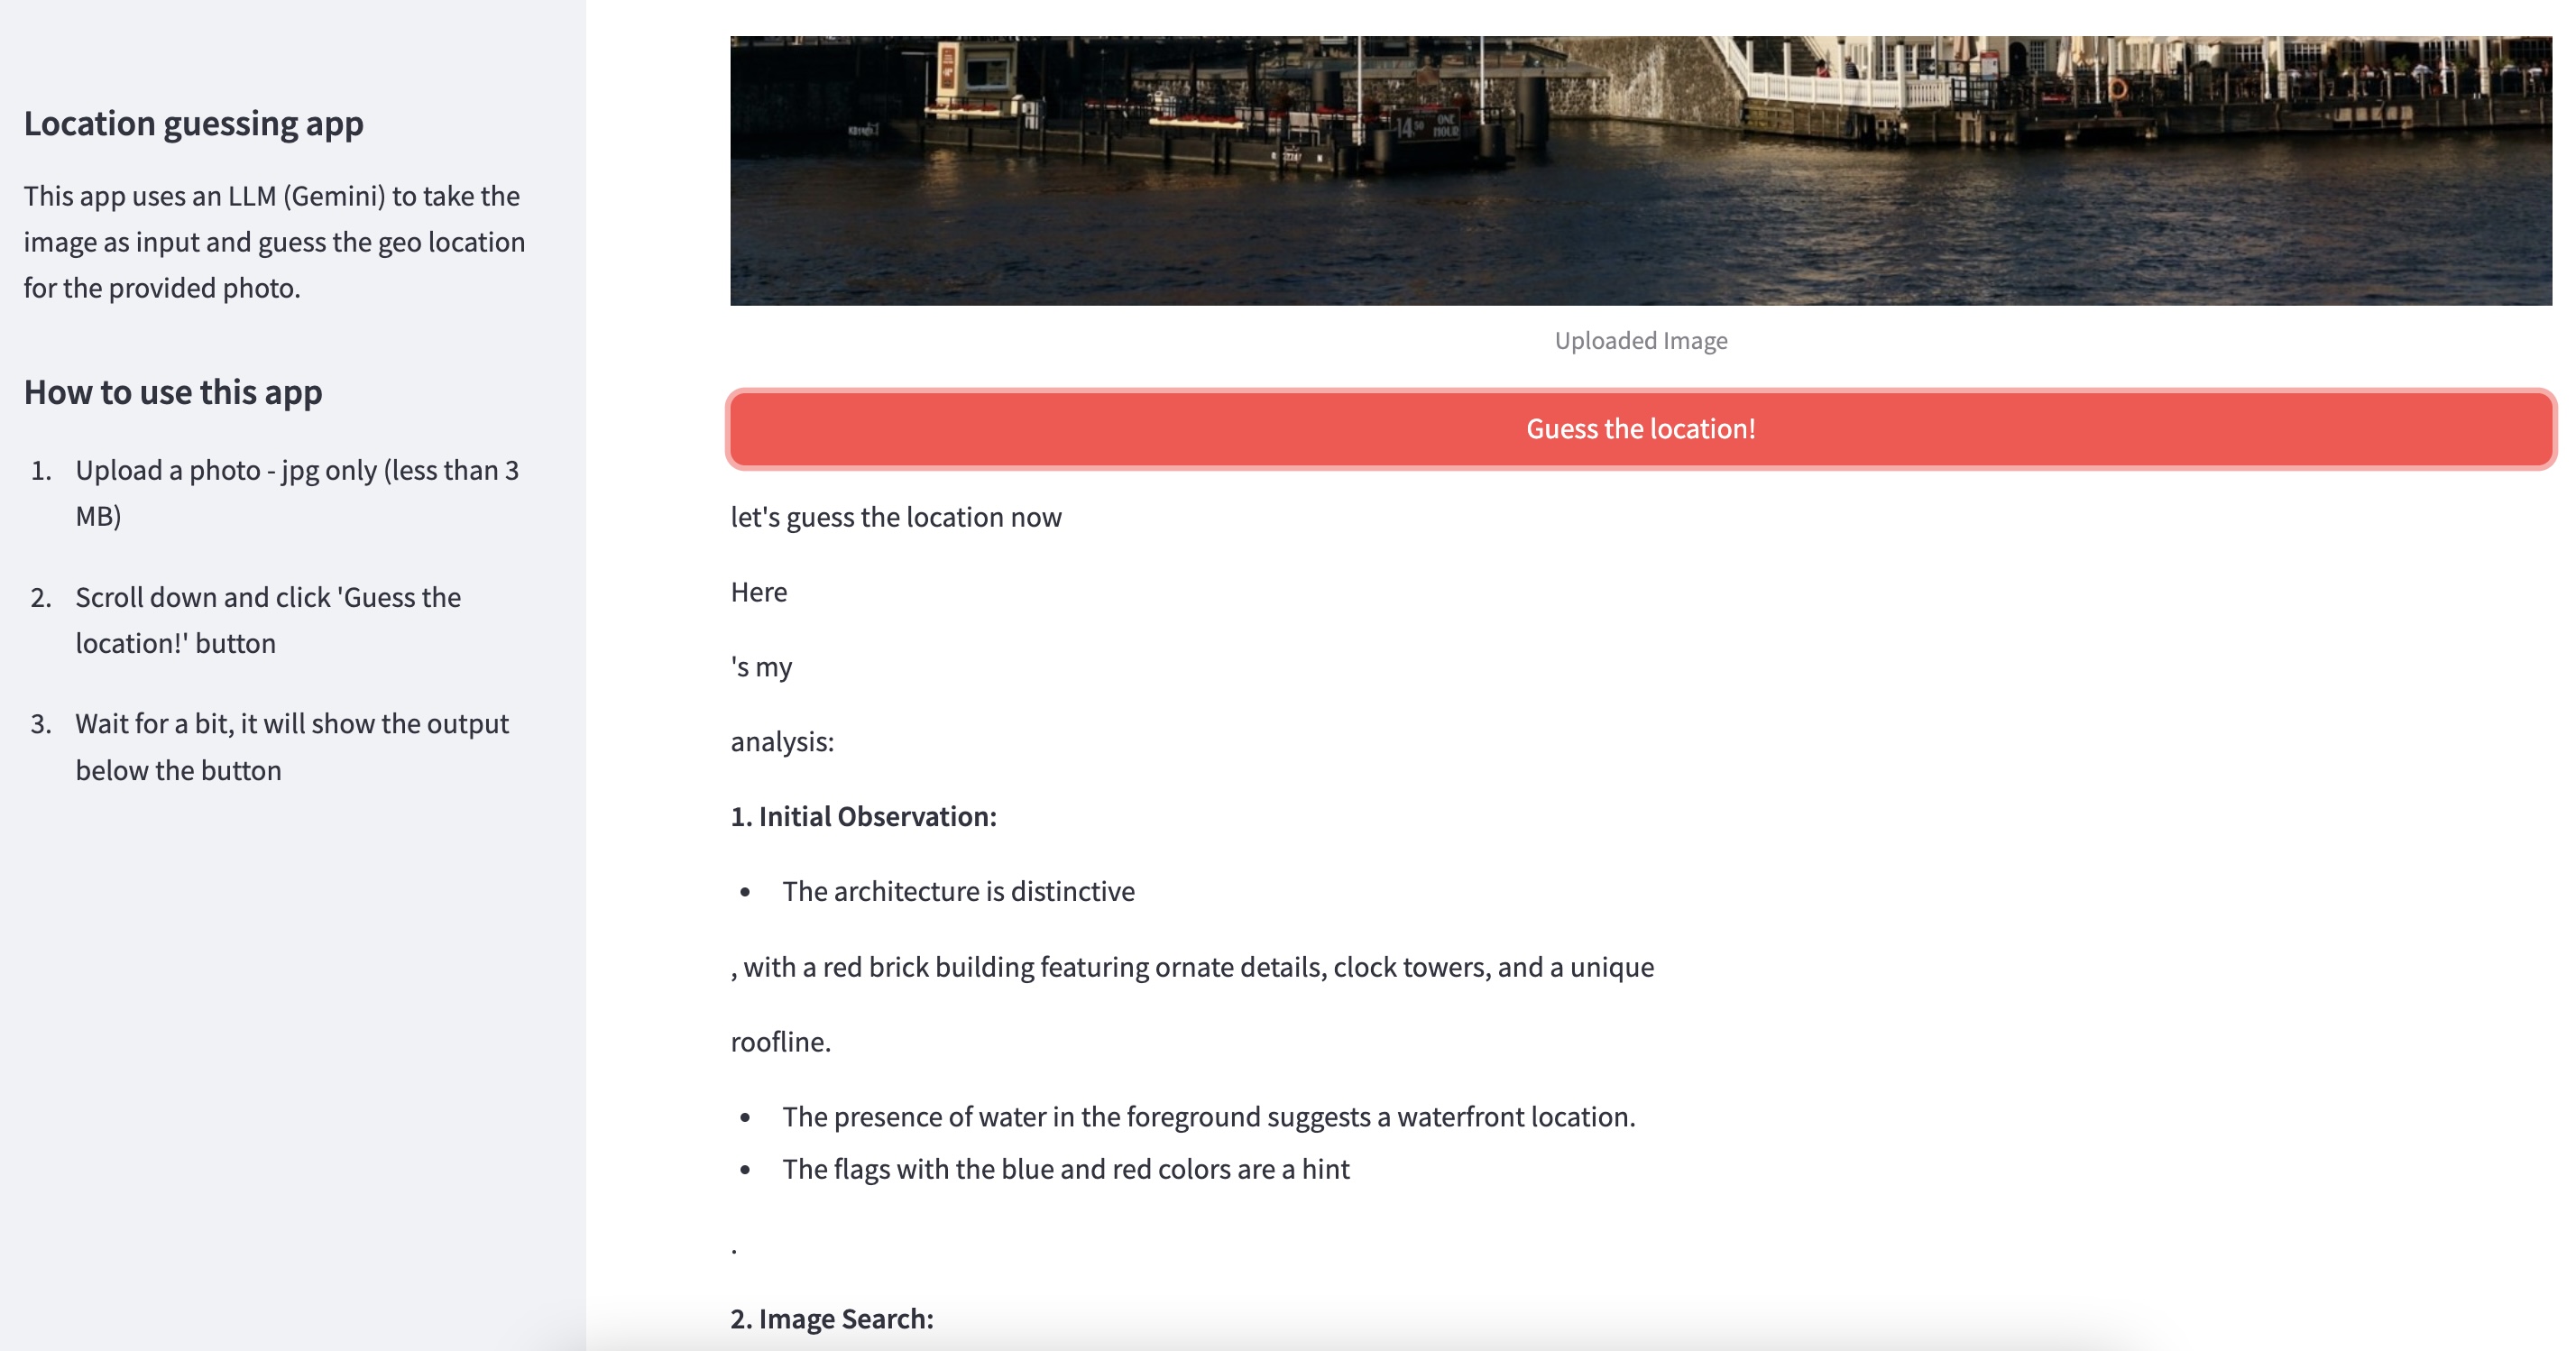
- You can click on the URL to see the Streamlit UI for the image to geo location guesser on a new tab. You can upload an image and see the geo location guesser in action. Try the
amsteradm-centraal.jpgimage from thephotosfolder. Browse and uplod the image then scroll down and clickGuess the location!red button:
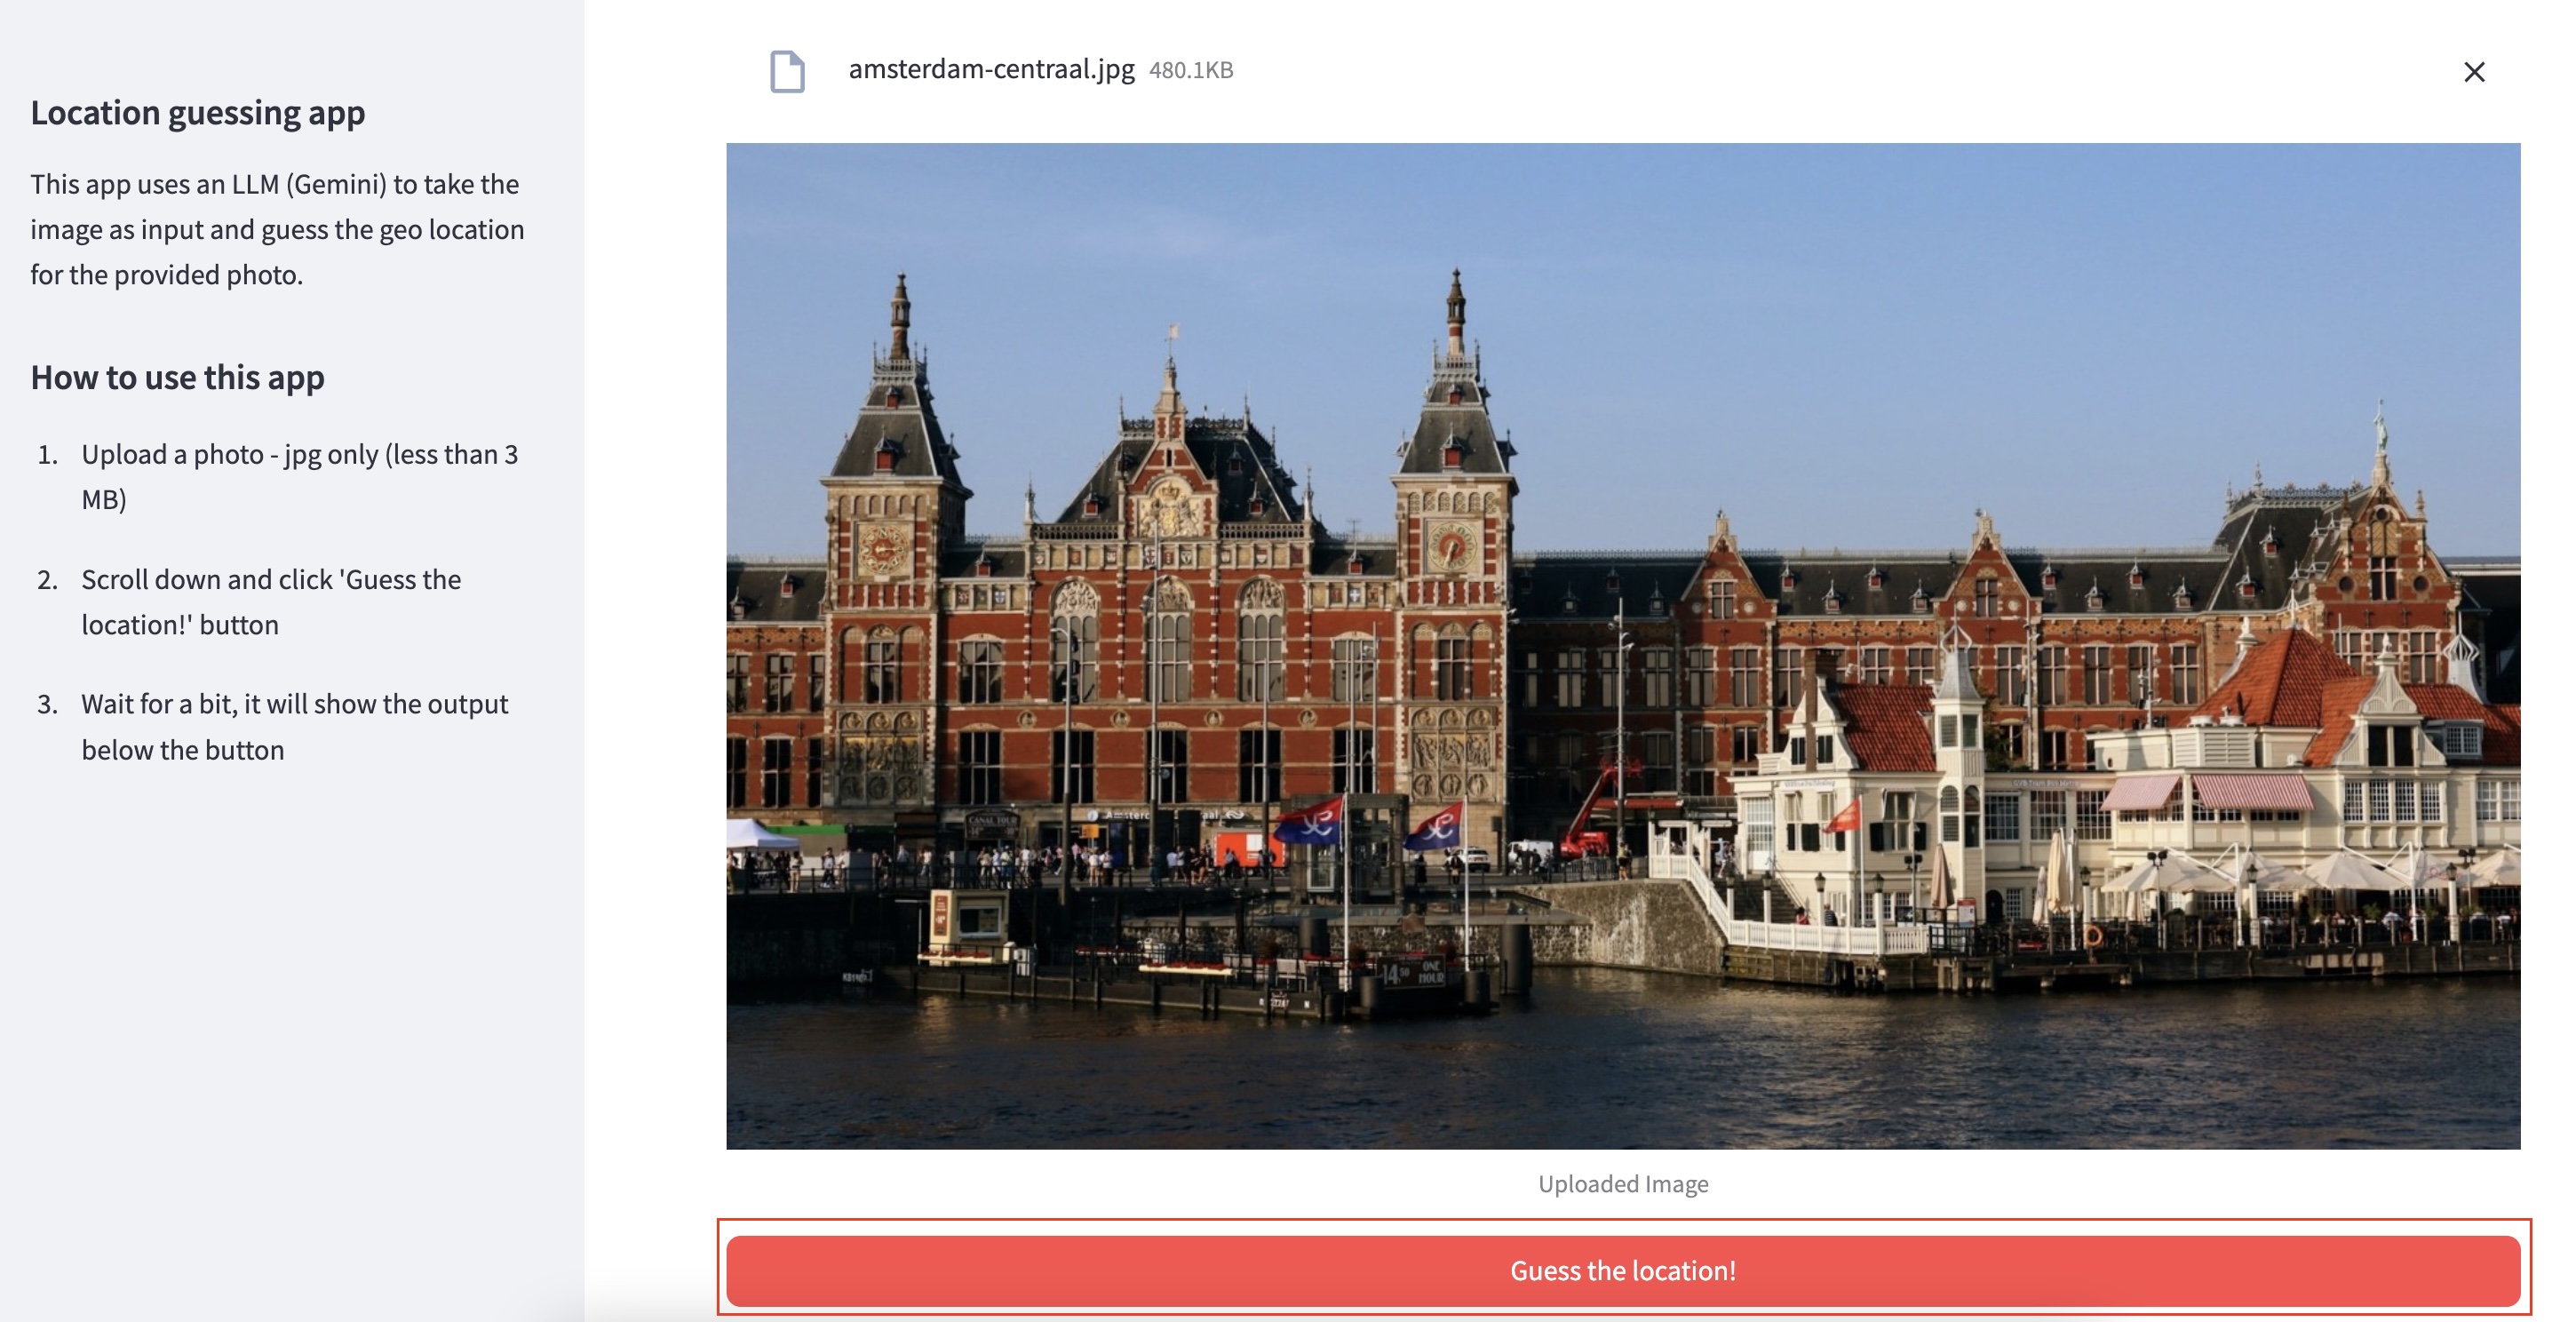
- After you click the
Guess the location!button, you will see the geo location guesser in action as seen below:
- When your Google Cloud credit runs out you can still experiment, and generate code with Google AI Studio
- You can play around with it as long as it is free.
- You can modify the code and boast to your friends about your new AI creation. You can also try out other models and prompts in Vertex AI. Possibly, you can stalk your friends' social media pictures :). Maybe explore some Agentic AI and do it by asking an "agent" to do it for you.
- It would be good idea to read more about LLMs in general and also about Gemini. You can also do course or code labs about Gemini on Cloud Skills boost platform.
Go back to the slides :).